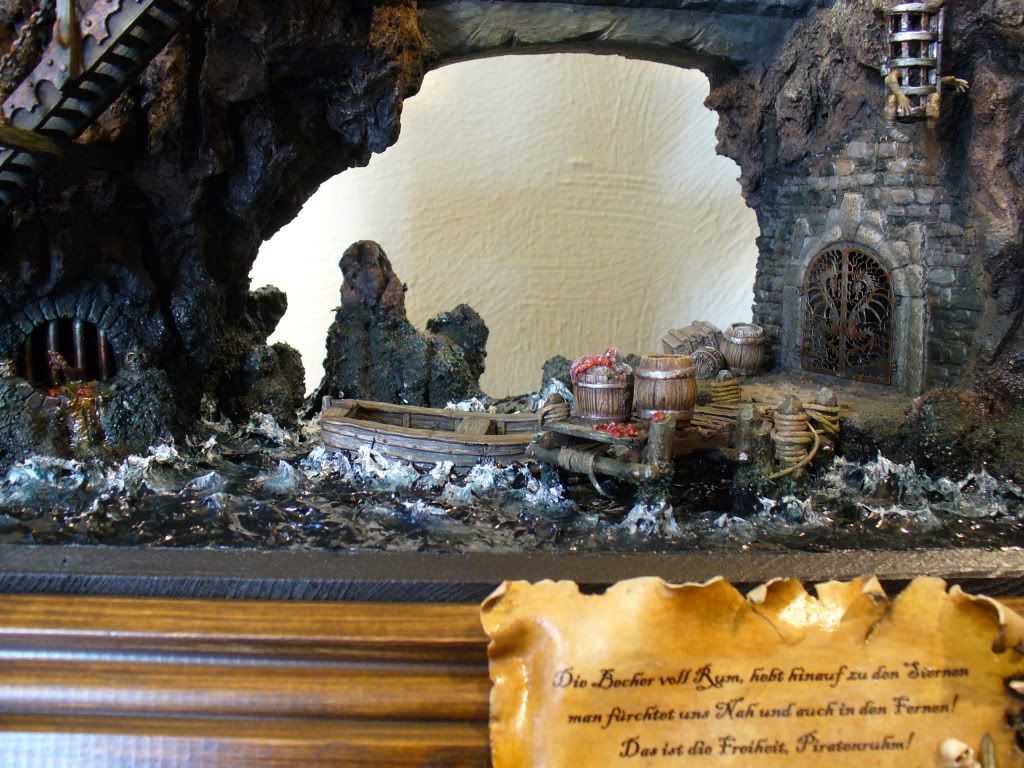
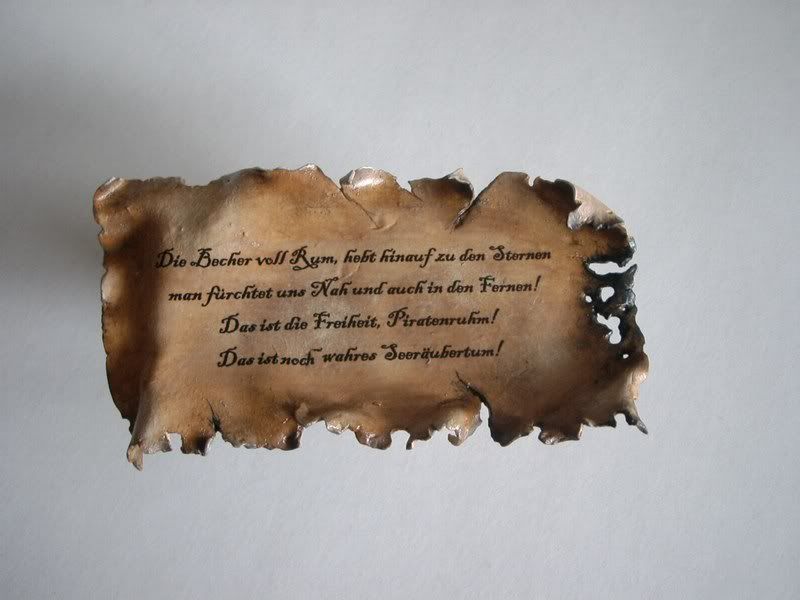
„Die Becher voll Rum, hebt hinauf zu den Sternen
Man fürchtet uns Nah und auch in den Fernen!
Das ist die Freiheit, Piratenruhm!
Das ist noch wahres Seeräubertum!“
Piraten, sie haben mich schon immer fasziniert und möglicherweise durch die Kino-Kassenschlager der letzten Jahre motiviert, hatte ich die Idee, dieses Thema in nicht nur einem, sondern in drei Dioramen zu verarbeiten.
2007 fiel der Startschuss für den ersten Teil der Trilogie mit dem Titel „Black Pirate Phantom“. Das Konzept dieses „Auftaktspieles“ war es, ein Piratenschiff zu zeigen, dessen Crew schon unter den Toten weilt und während sie auf ihrer Phantom - die halb Schiff , halb Festung ist - über alle Weltmeere segelt, Angst und Schrecken verbreitet.
2008 wurde das Projekt mit dem hier beschriebenen Diorama fortgesetzt. In dieser „Folge“ wollte ich das Gegenstück zur „Black Pirate Phantom“ darstellen, ebenfalls Piraten, denen allerdings noch Blut durch die Adern fließt.
Auch wenn sich Piraten auf hoher See am wohlsten fühlen, brauchen sie dennoch einen Unterschlupf, eine geheime Anlegestelle, wo sie ihre Schätze verstecken und sich von den Strapazen der Piraterie erholen können. So kam mir der Einfall für die Gestaltung des zweiten Teiles.
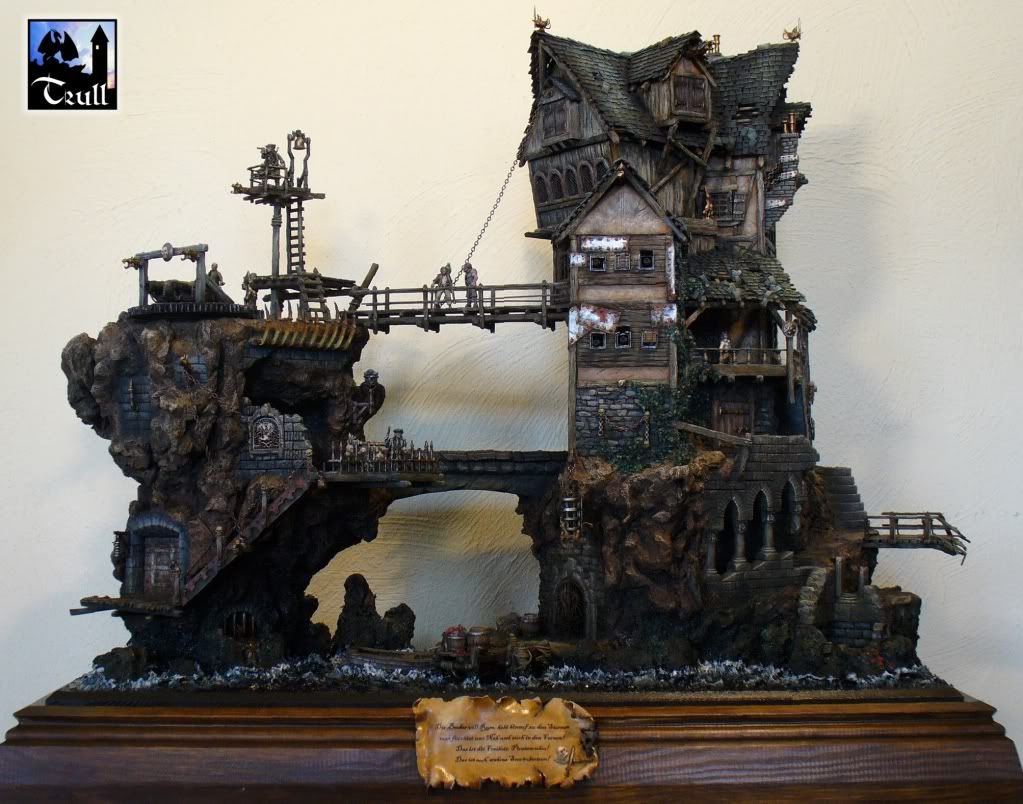
Von Illustrationen aus einer Auswahl von ´Pen & Paper´ Rollenspielen, wie zum Beispiel ´Five Fingers´ (Privateer Press), inspiriert, wollte ich ein auf Fels errichtetes Gebäude darstellen, das ein Verteidigungssystem beherbergen und aussehen soll, als ob es über die Jahre hinweg durch den Anbau von neuen Gebäudeteilen immer weiter gewachsen sei.
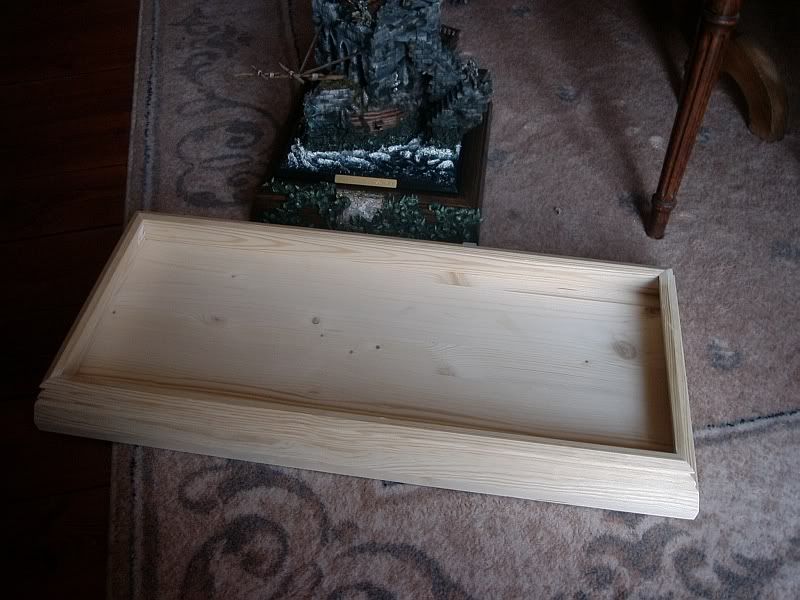
Das Grundkonzept war nun erstellt und ohne einen weiteren Gedanken zu verschwenden, begann ich den Bau des Dioramas. Zunächst wurde der Grundriss von 30 x 70 cm festgelegt - doppelt so groß wie der der „Black Pirate Phantom“.
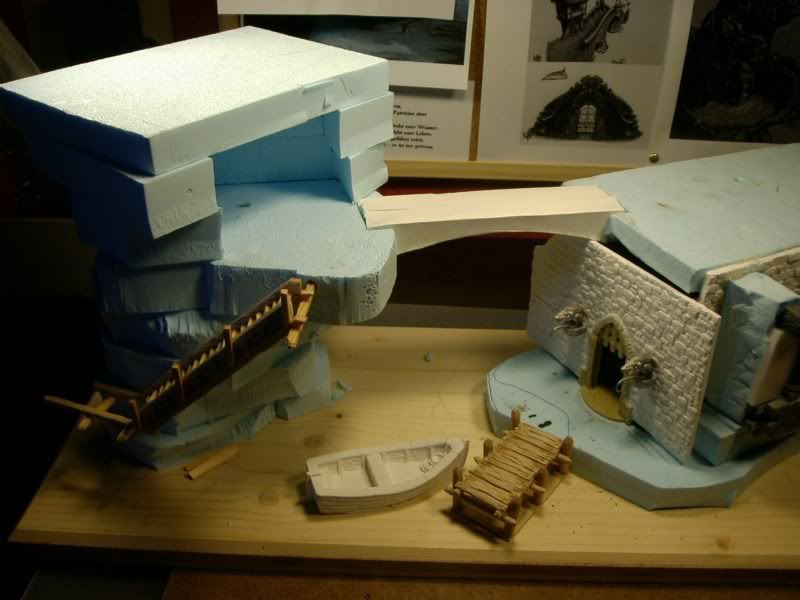
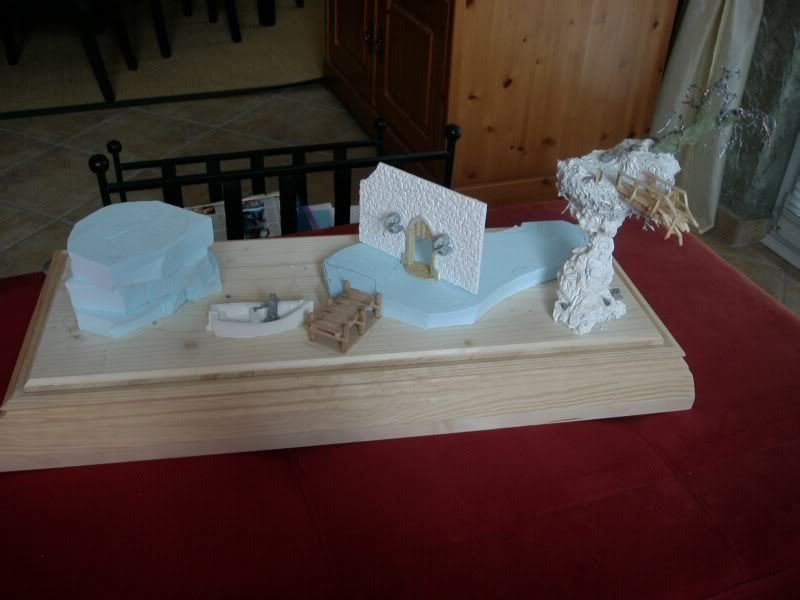
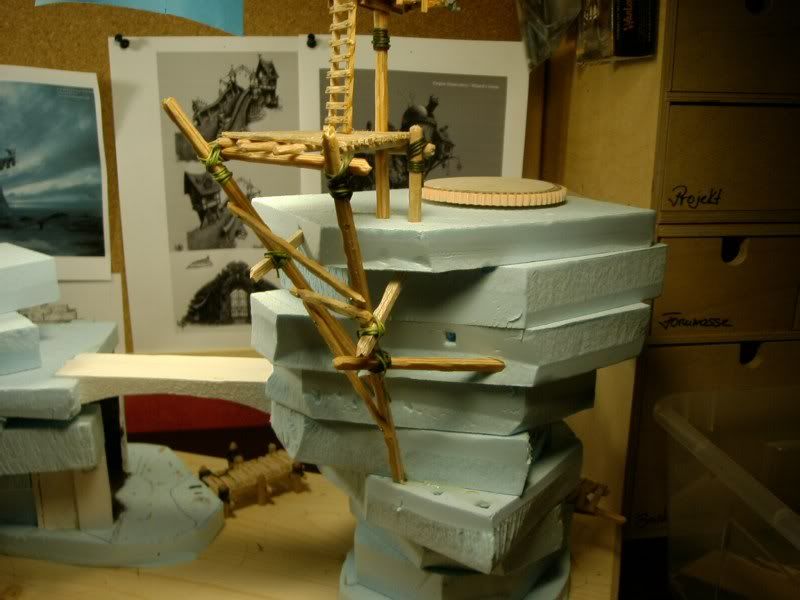
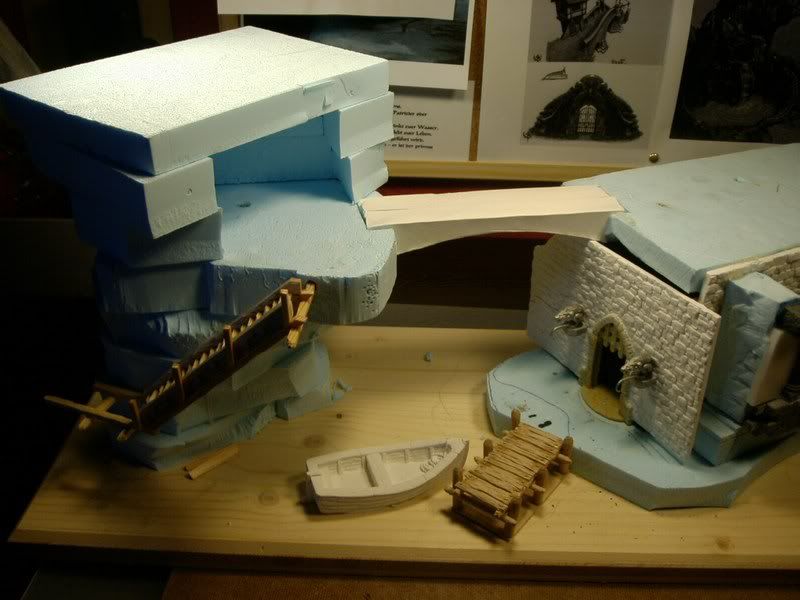
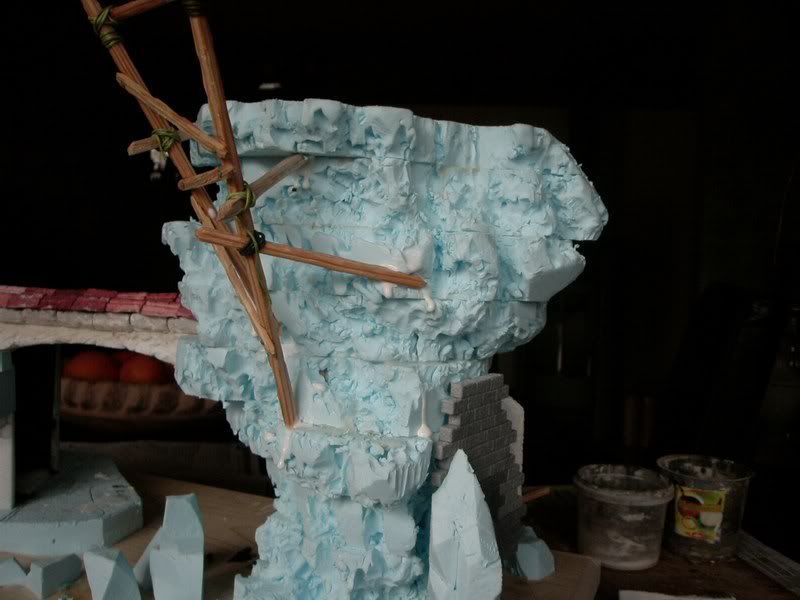
Um ein Gefühl für die Größe jedes einzelnen Felsen zu bekommen, baute ich ein grobes Modell aus Styrodur, indem ich kleinere Rest-Styrodurblöcke einfach aufeinander stapelte. Anhand dieses Grundgerüstes setzte ich die Höhe des Gebäudes und des Abwehrsystemes fest.
Eigentlich sollte das Diorama aus drei Felsen unterschiedlicher Größe bestehen: Dem Verteidigungssystem, dem Hauptgebäude und einem weiteren, kleinen Felsen mit einem knorrigen Baum. Aber nachdem ich den kleinen Felsen fertiggestellt hatte, beschloss ich, diesen zu wieder zu entfernen, denn er passte nicht in das Gesamtbild.
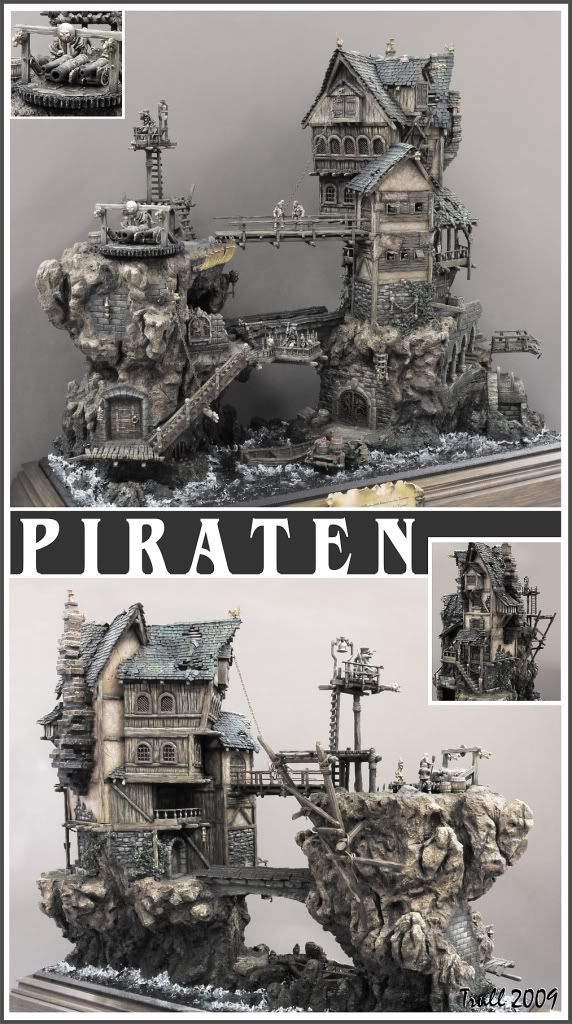
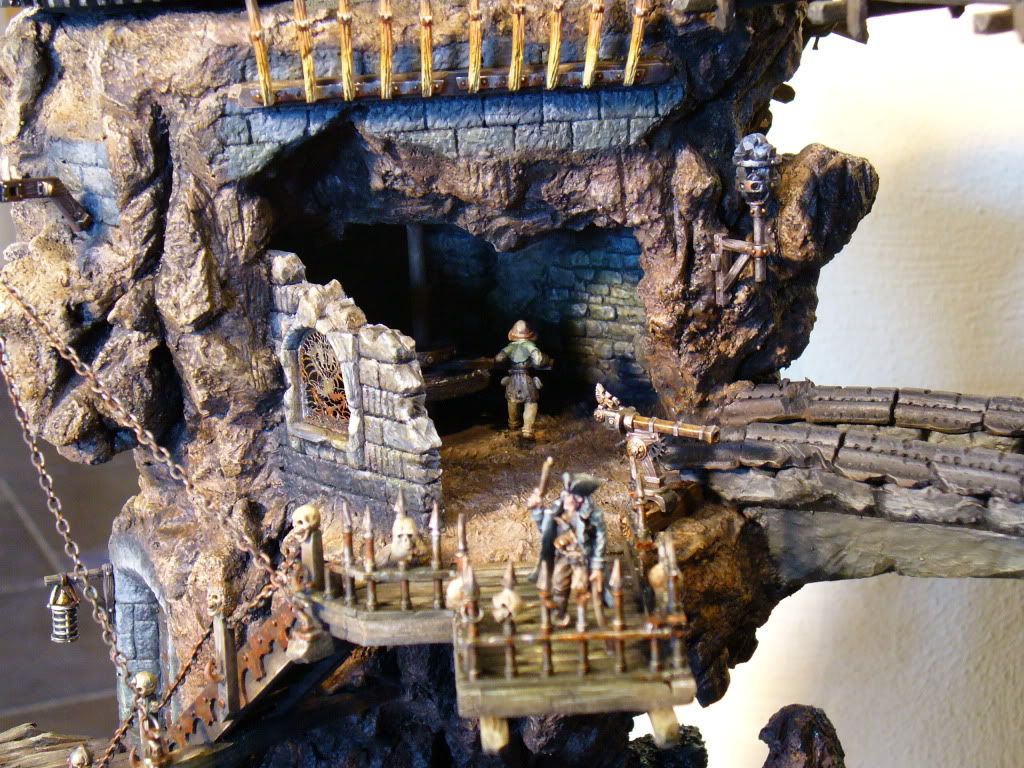
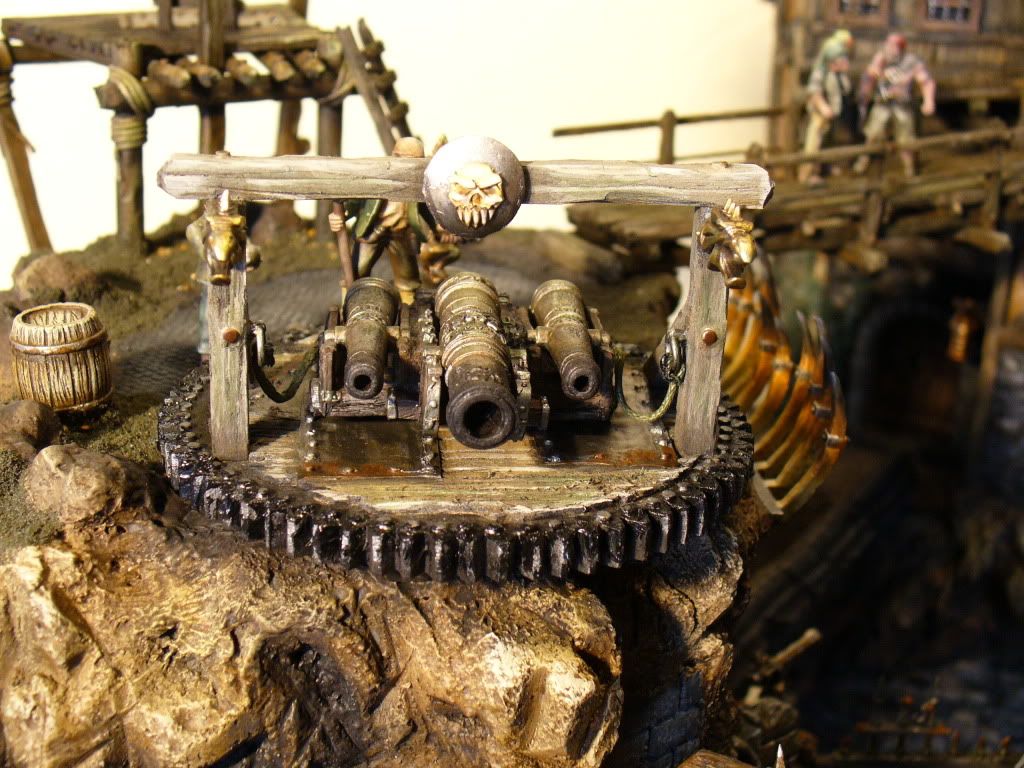
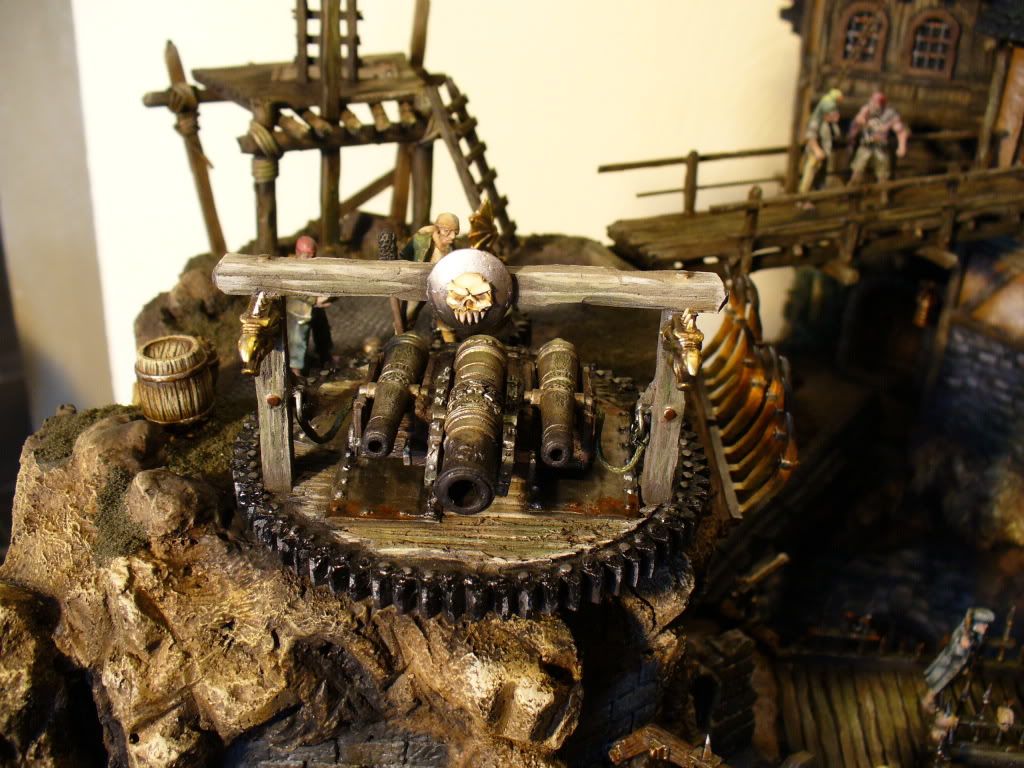
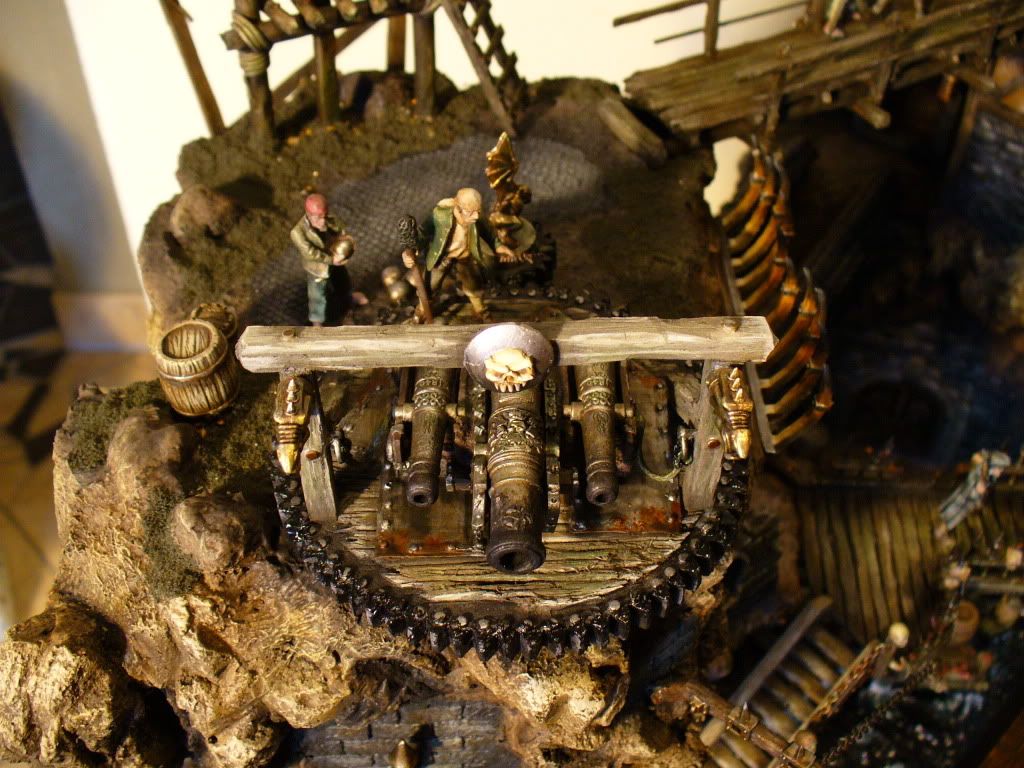
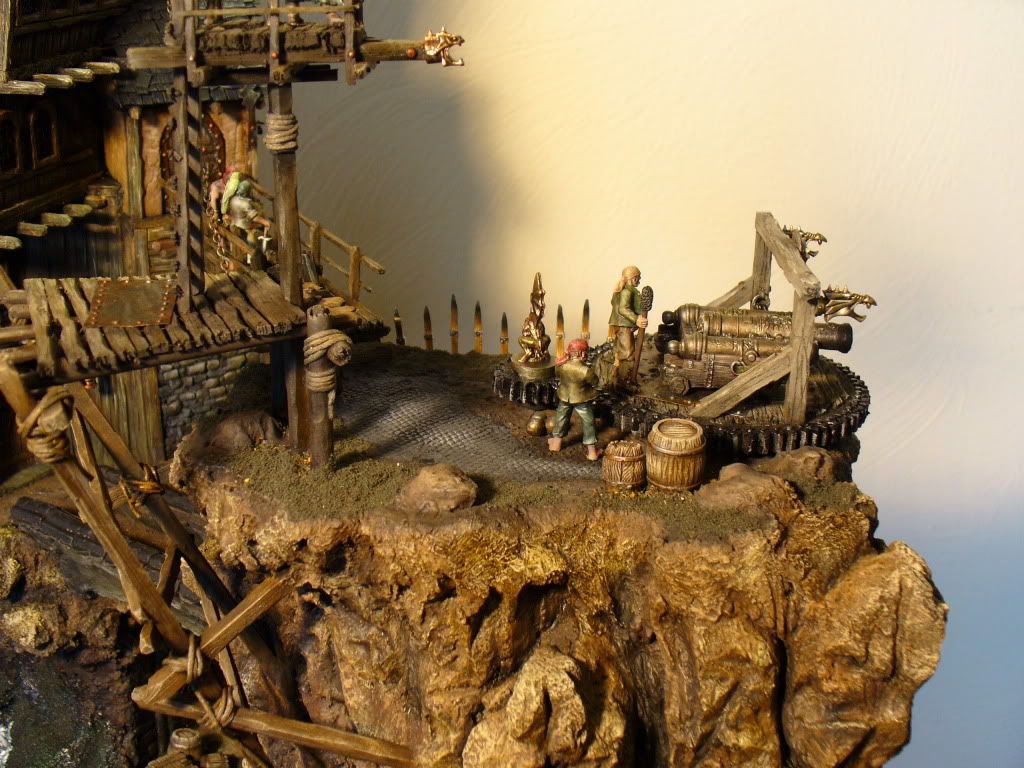
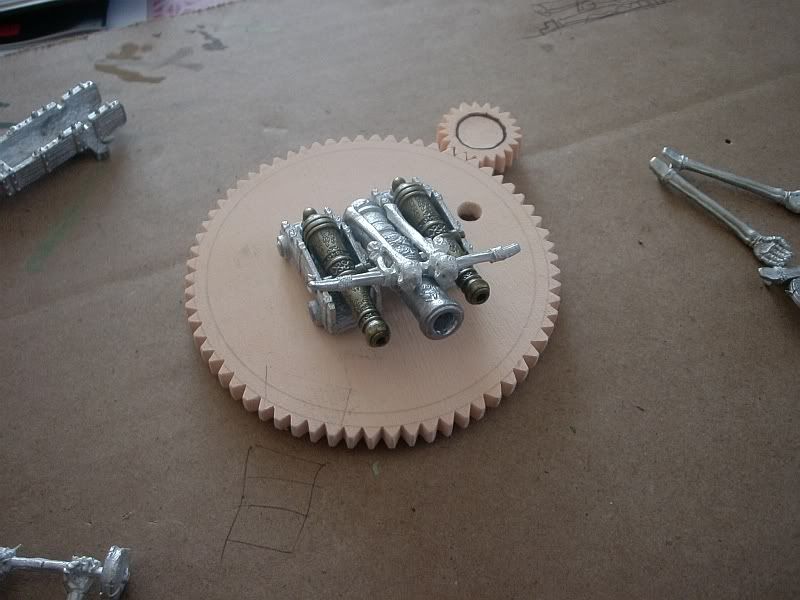
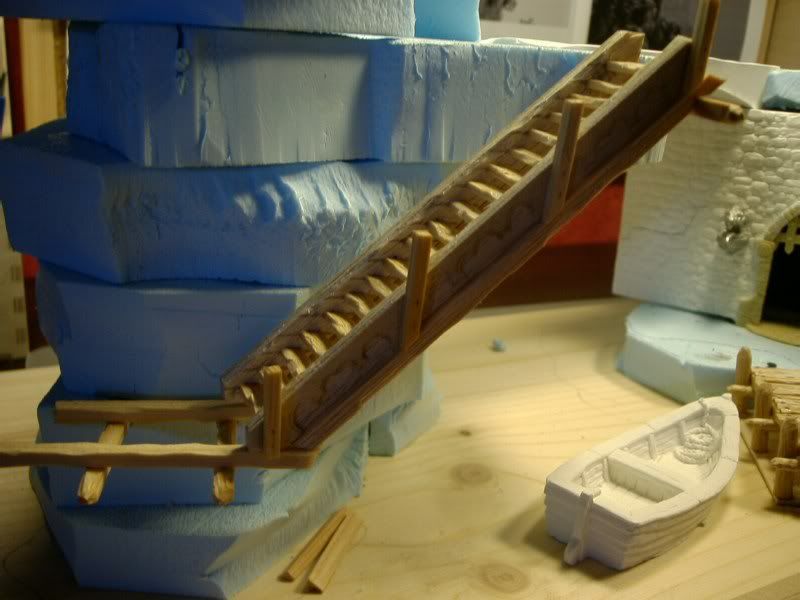
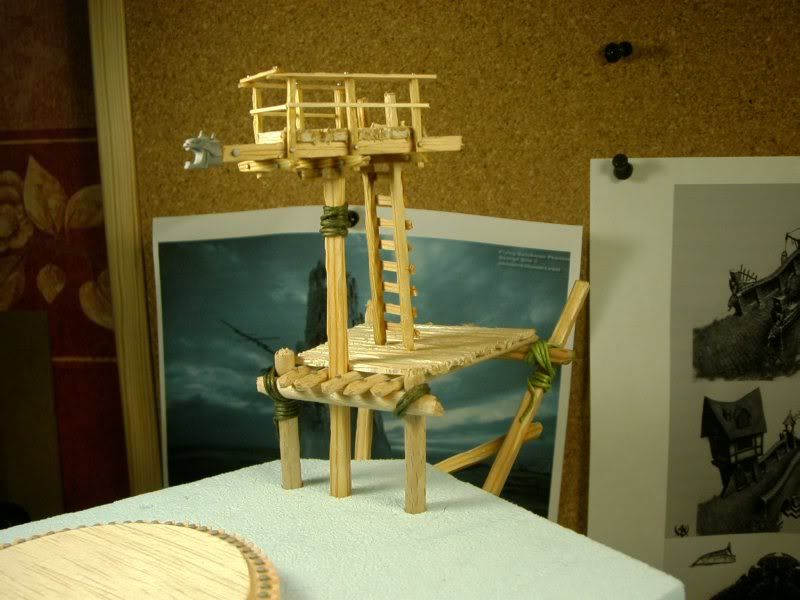
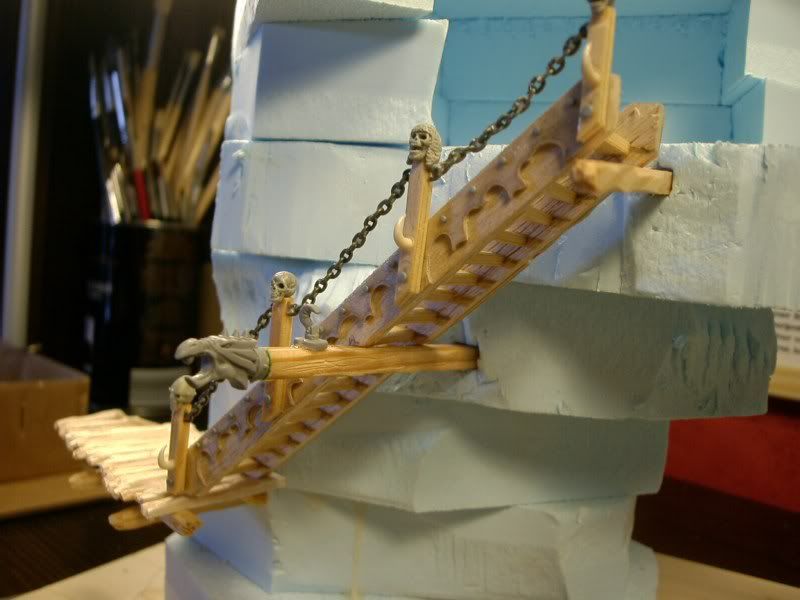
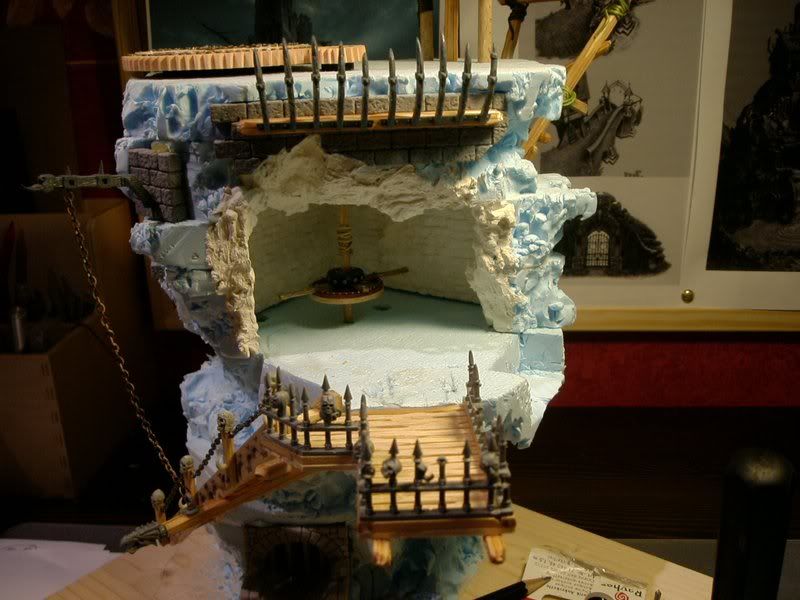
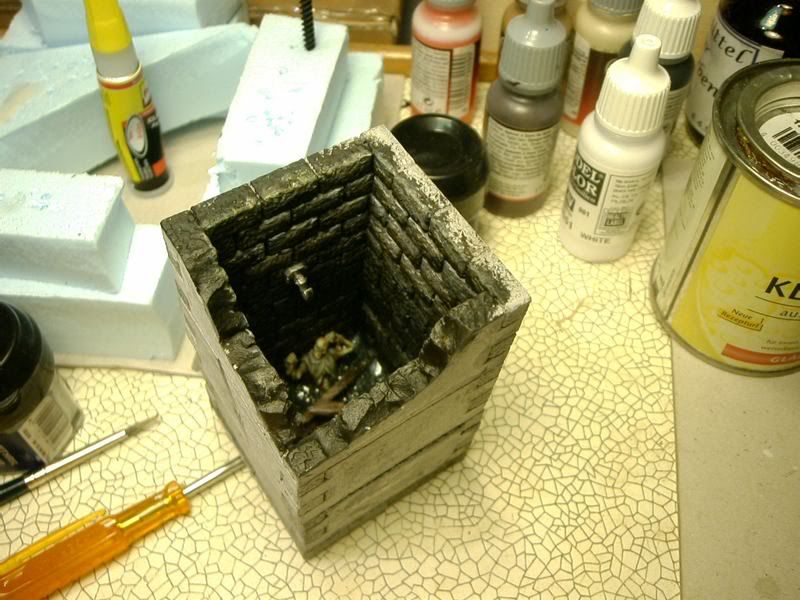
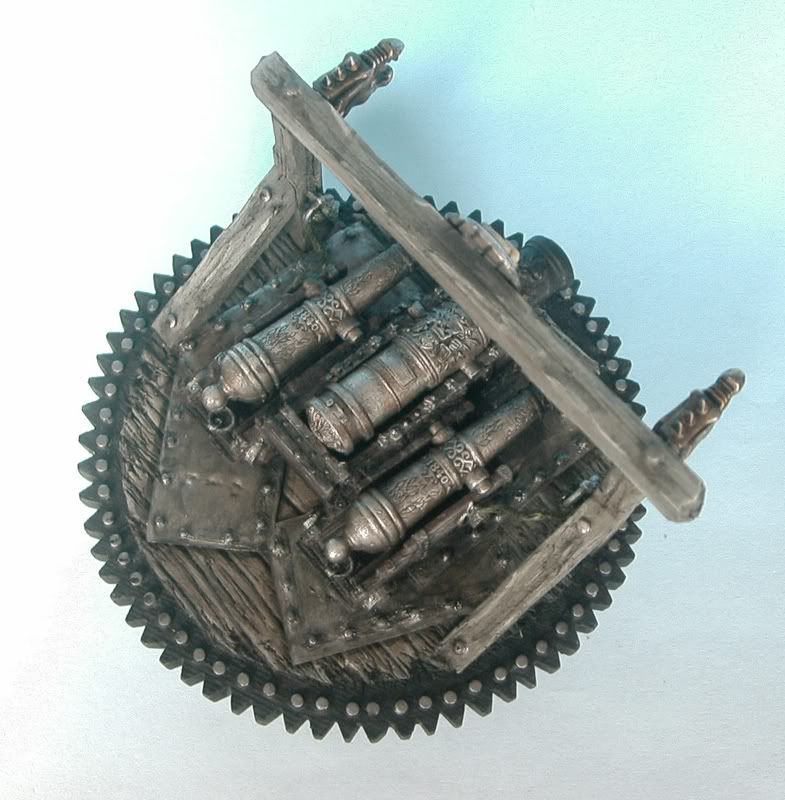
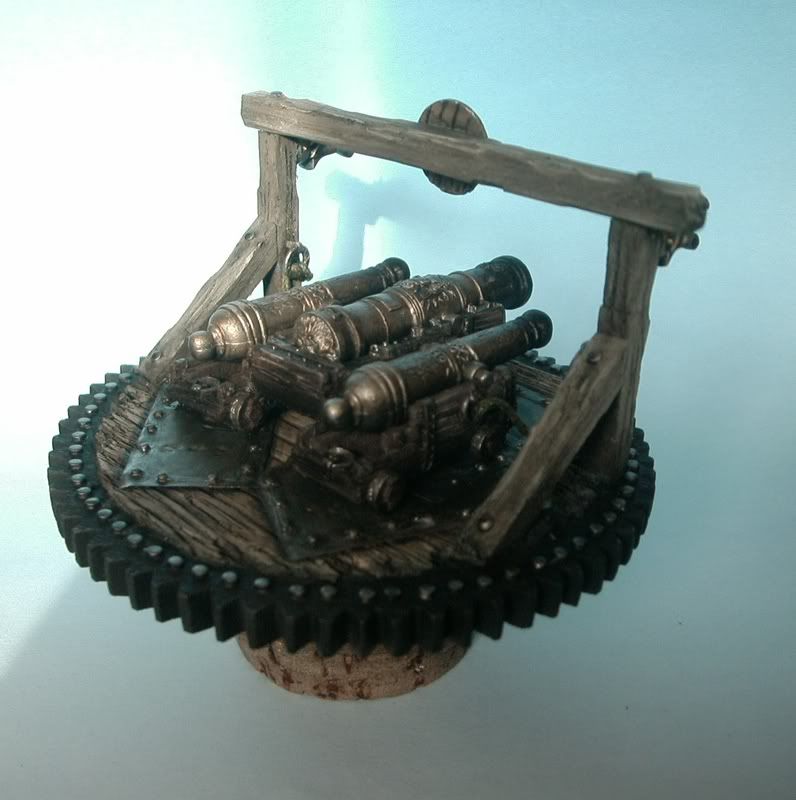
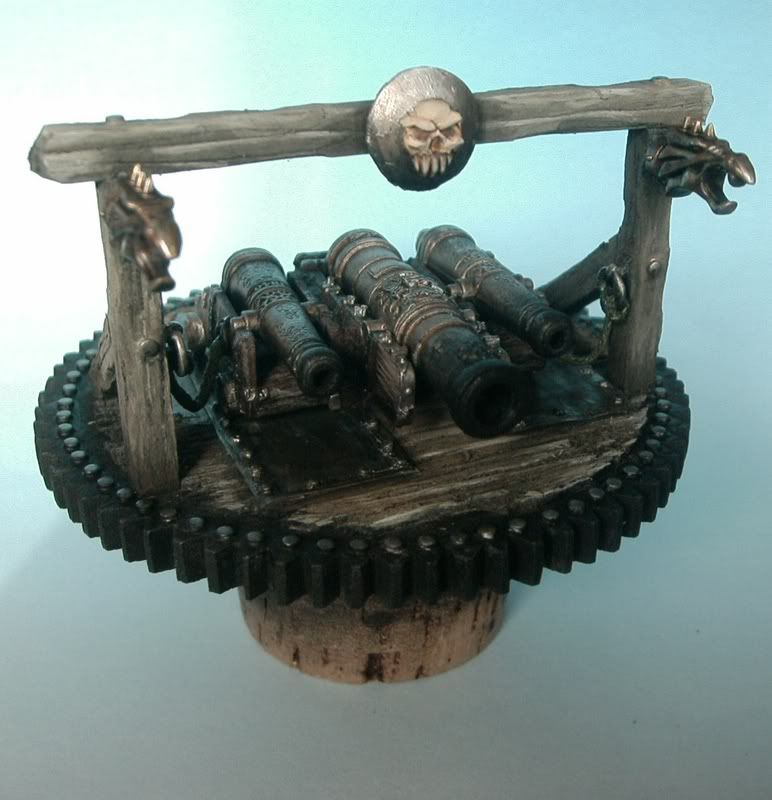
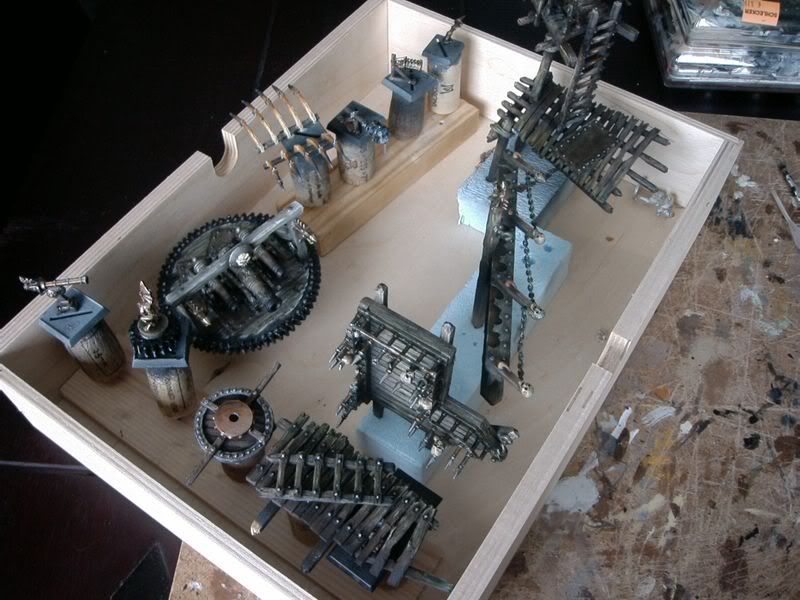
Jetzt war das Verteidigungssystem an der Reihe. Es hat eine aus mehreren einzelnen Kanonen zusammengesetzte „Große Kanone“, die von einem Zahnrad angetriebenen Mechanismus in einem der unteren Stockwerke aus in Bewegung gesetzt wird sowie eine Treppe hinunter zum Meer und einen Wachturm - wie es sich für eine solche Bastion gehört.
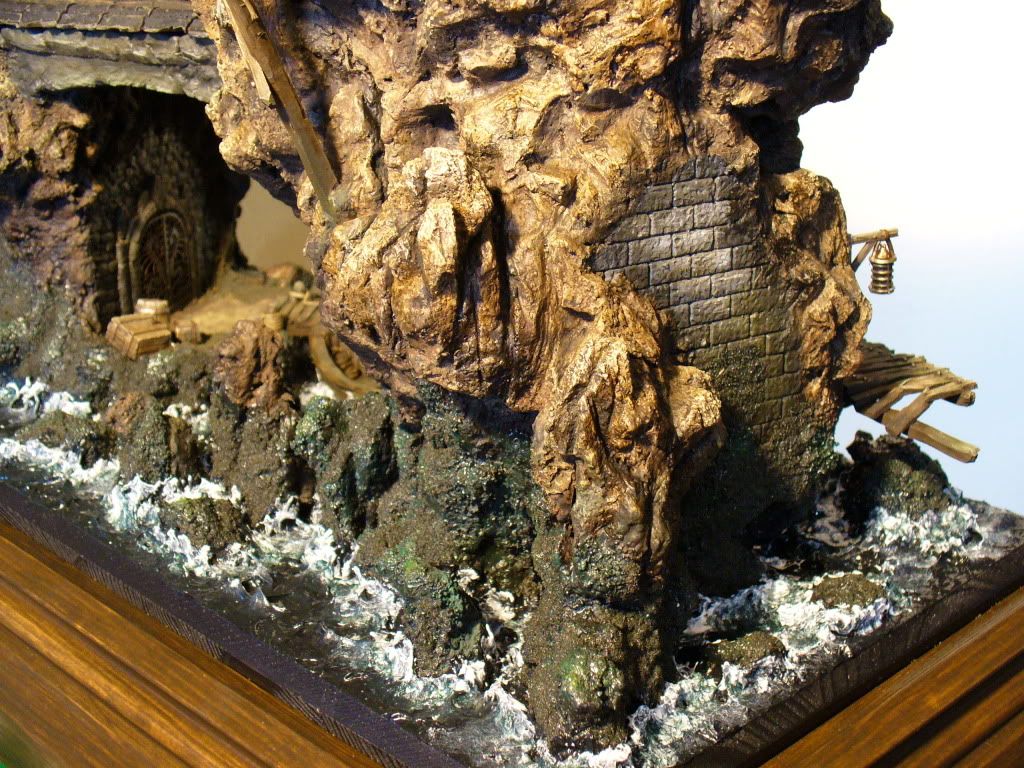
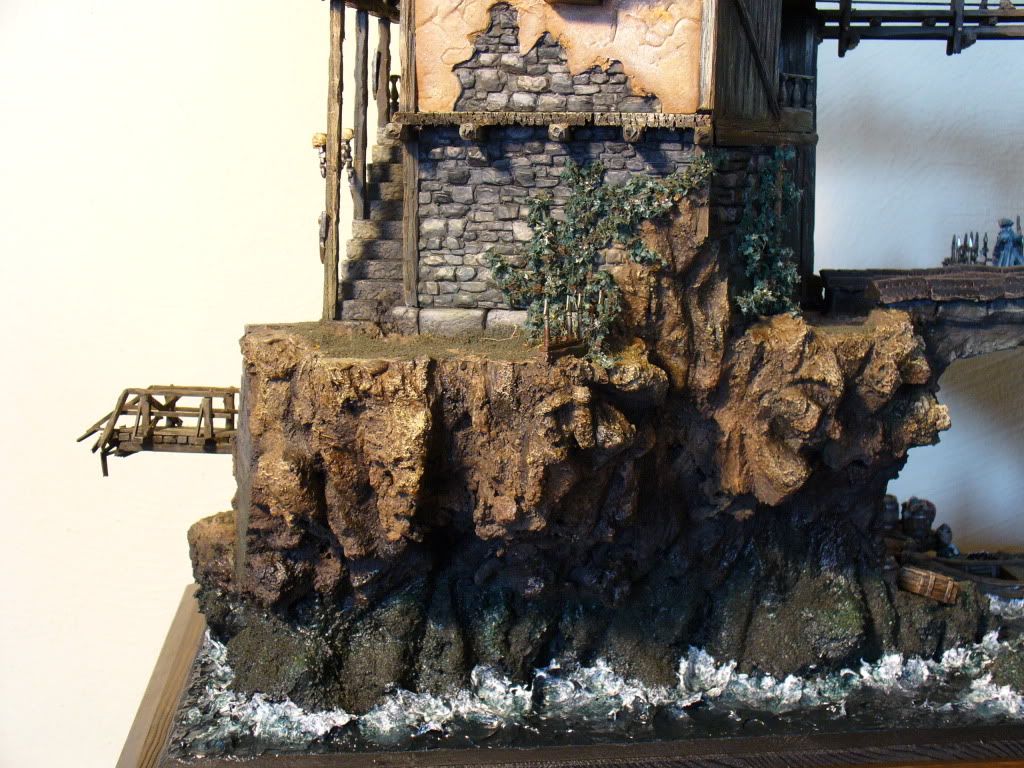
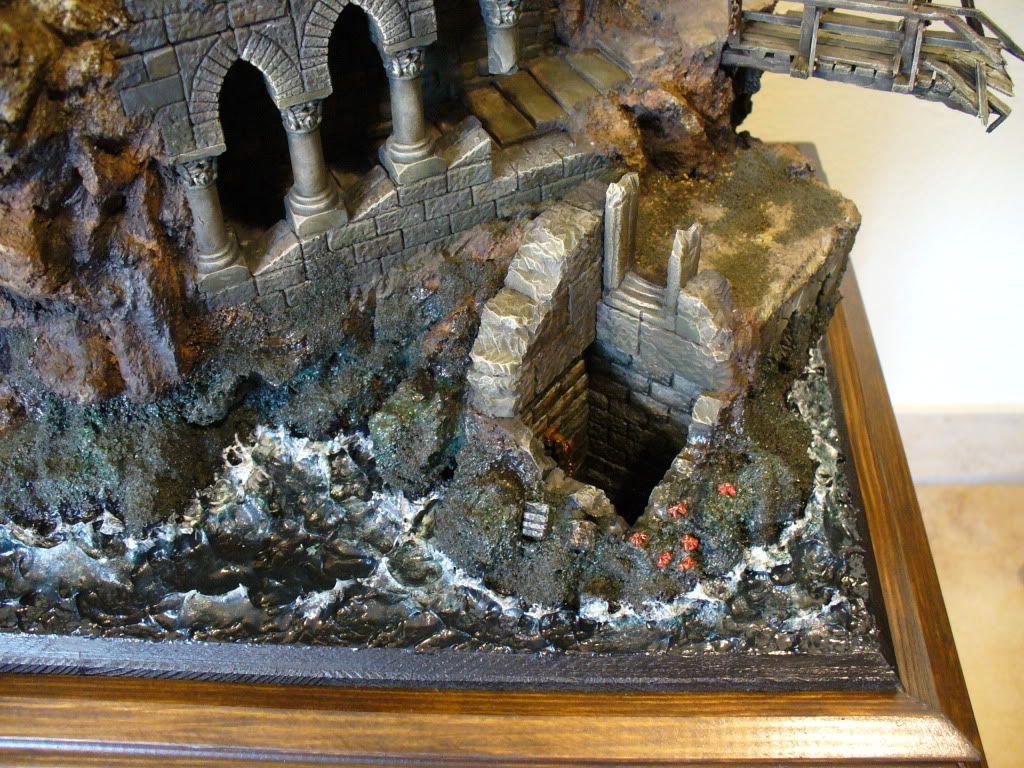
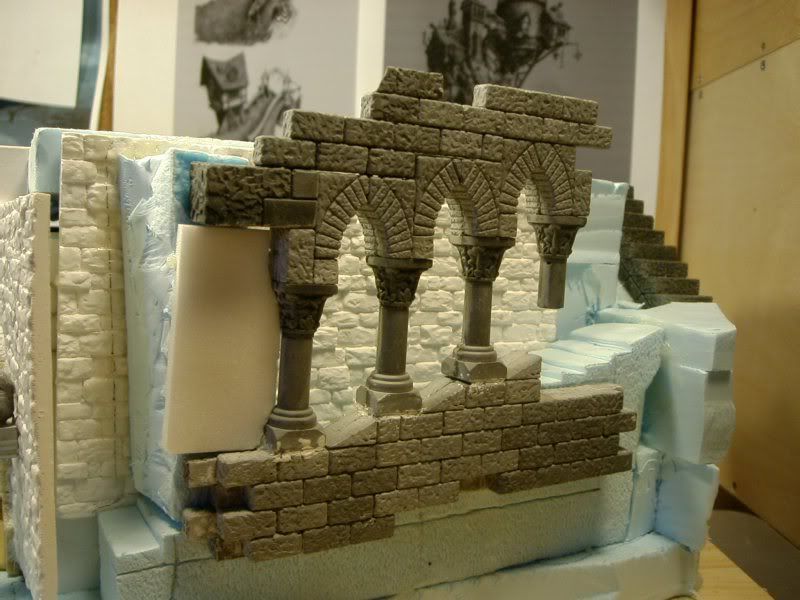
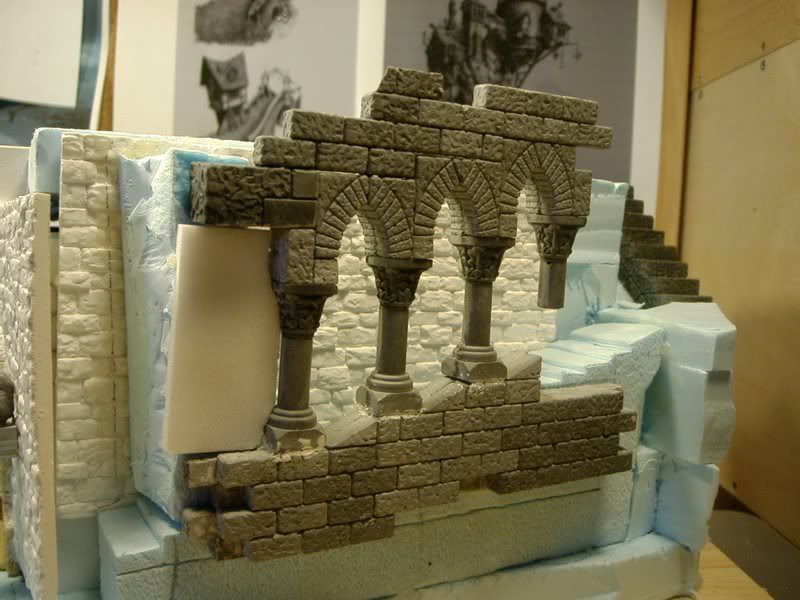
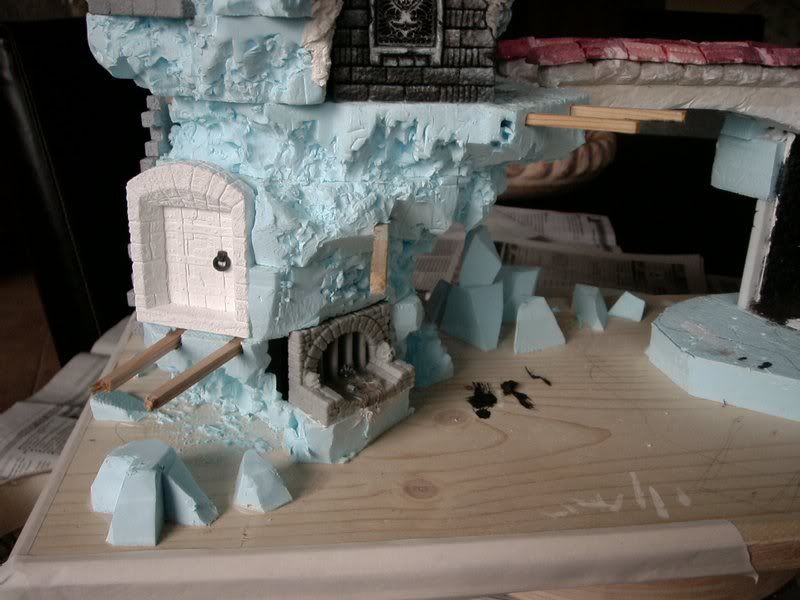
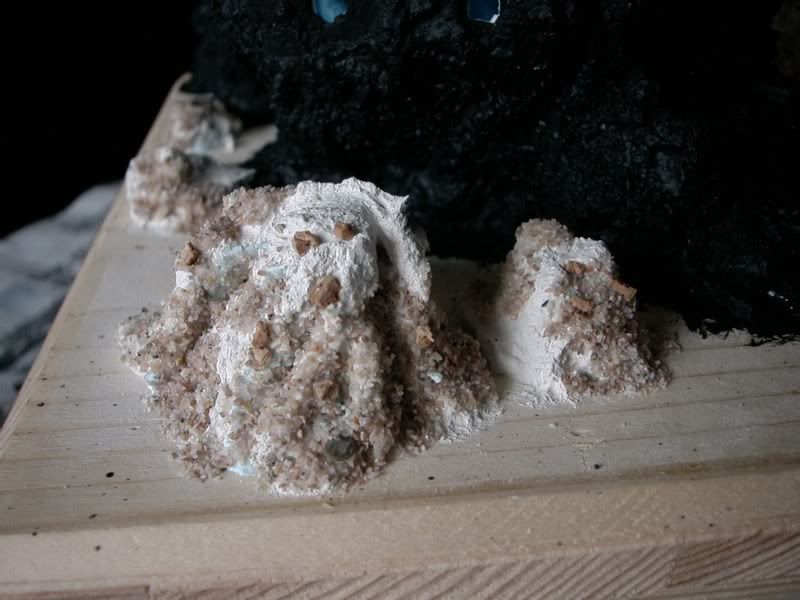
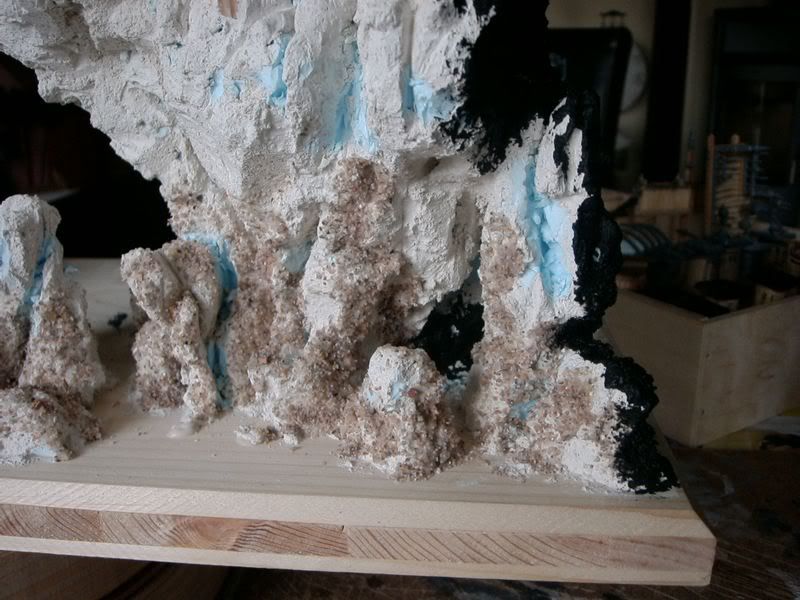
Alle Felsen bestehen aus Styrodur. Zunächst klebte ich einzelne Styrodur-Platten zusammen und schnitt unter Verwendung eines Messers die grobe Felsenstruktur heraus. Danach überzog ich den Felsblock mit handelsüblichem Gips. Nach dem Trocknen ließ sich die restliche Felsenstruktur leicht herausarbeiten, zum Beispiel mittels eines Schraubendrehers. Die gerade noch über dem Meeresspiegel liegenden Felsenteile, überzog ich mit grobkörnigem Sand, das nach der Bemalung aussehen soll, als hätten sich Unmengen von Muscheln an den Felsen angesiedelt.
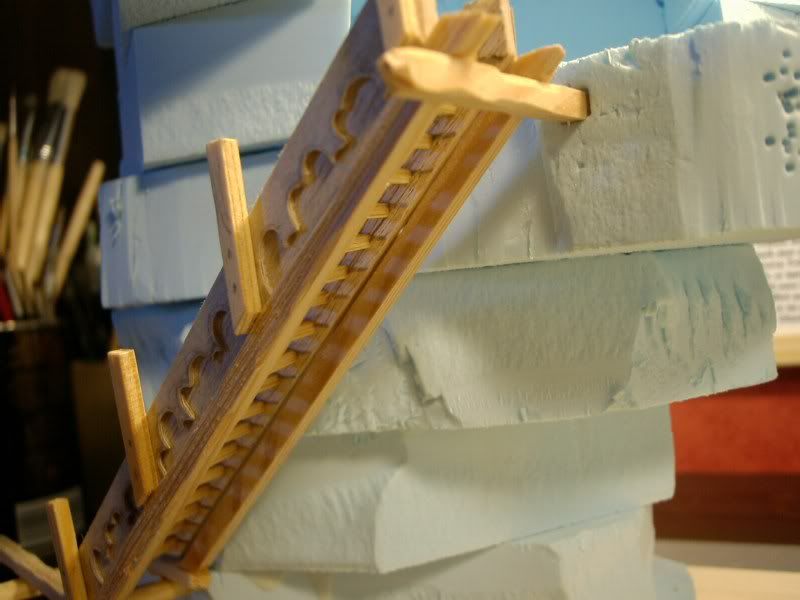
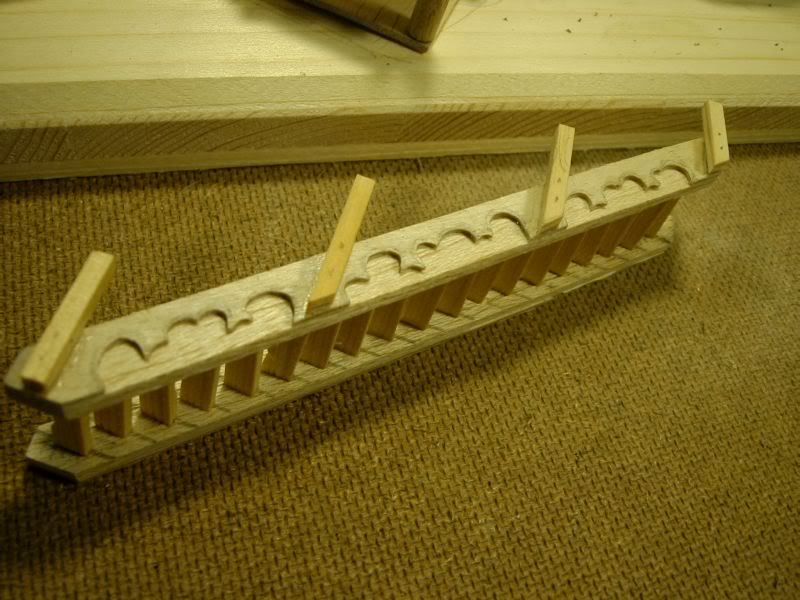
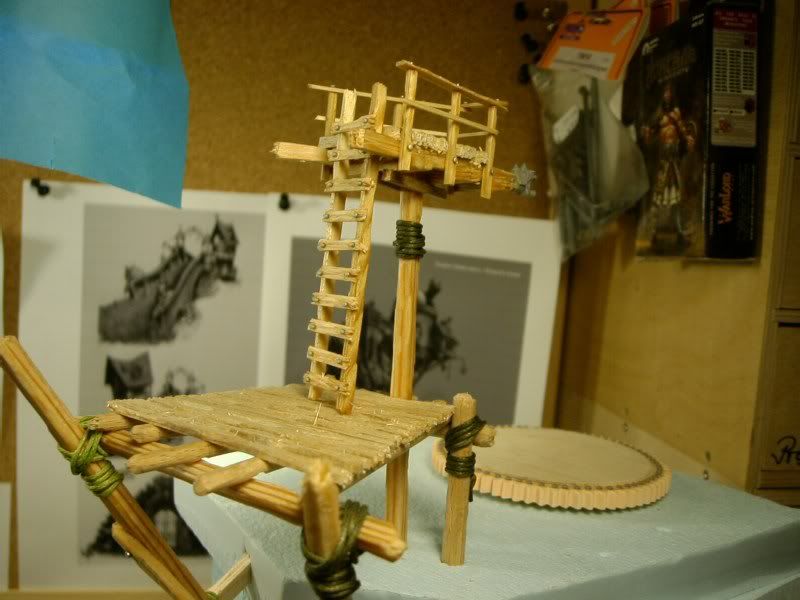
Der Aussichtsturm, die Plattform und die Treppenstufen sind aus Holzbrettchen aus dem Baumarkt gefertigt. Ich habe versucht, die Holzstruktur anhand von Echtholz-Mustern naturgetreu und „statisch“ korrekt nachzubilden, so dass das Gesamtbild so authentisch wie möglich wirkte.
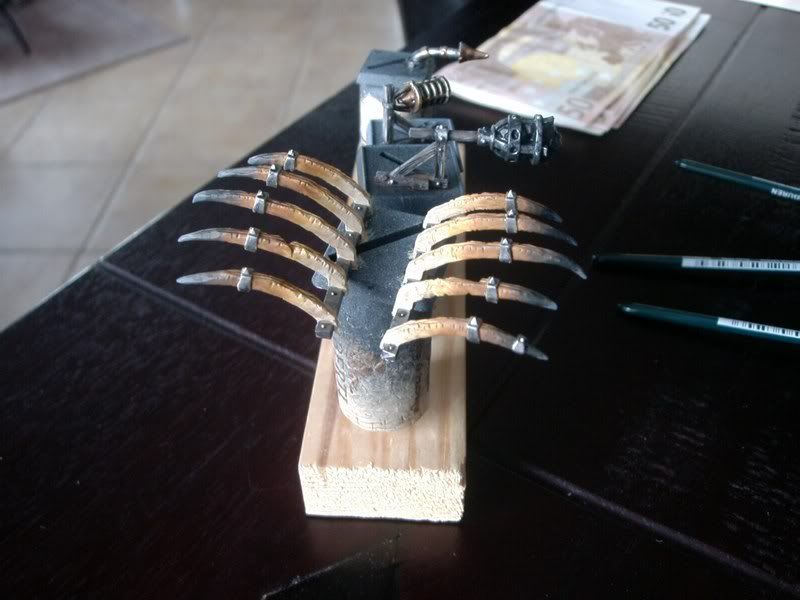
Hier, wie auch an anderen Stellen des Dioramas, baute ich eine Auswahl vieler kleiner Elemente und Figuren unterschiedlicher Hersteller ein. Was mir als geeignet erschien, verwendete ich.
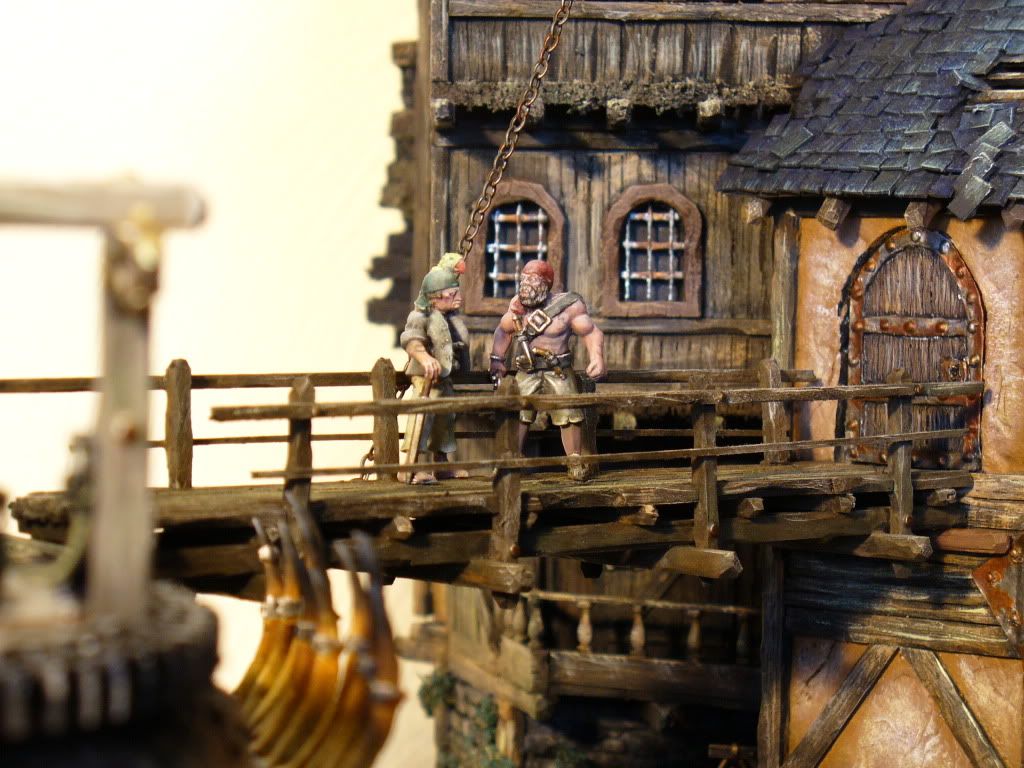
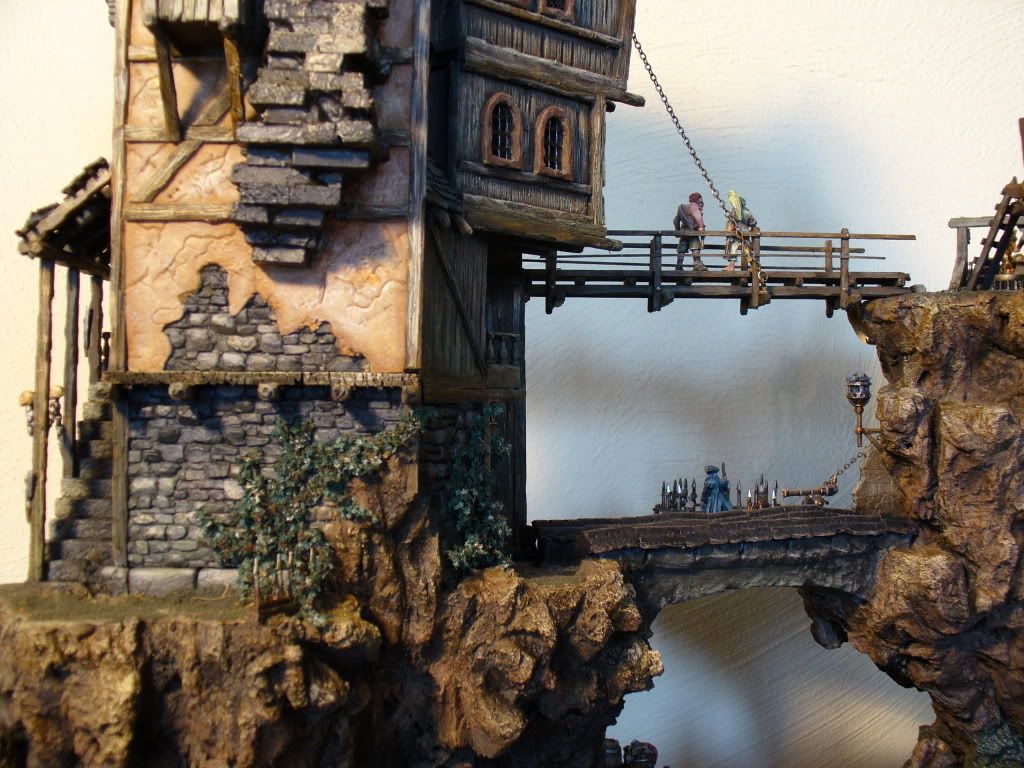
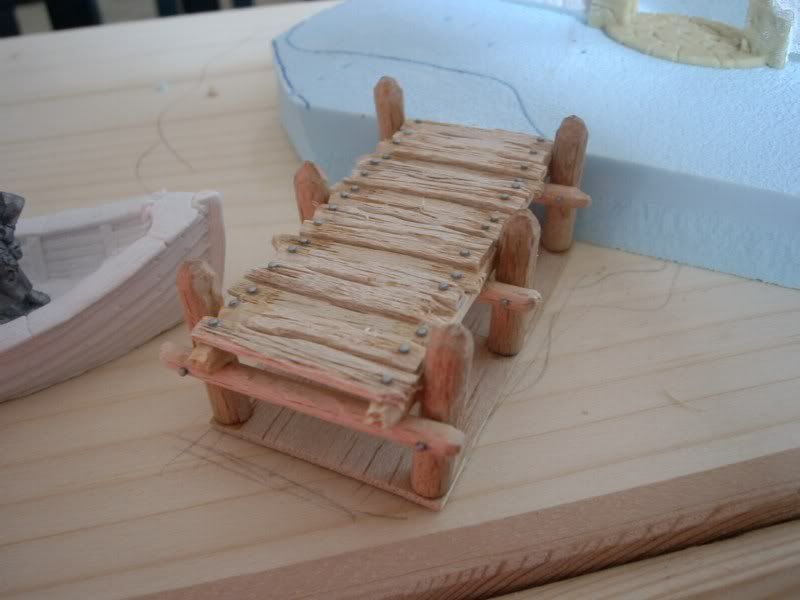
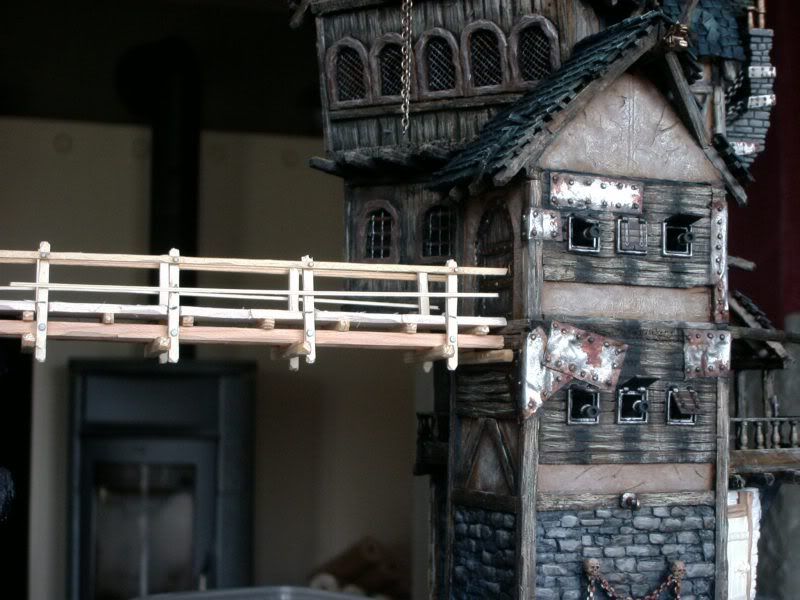
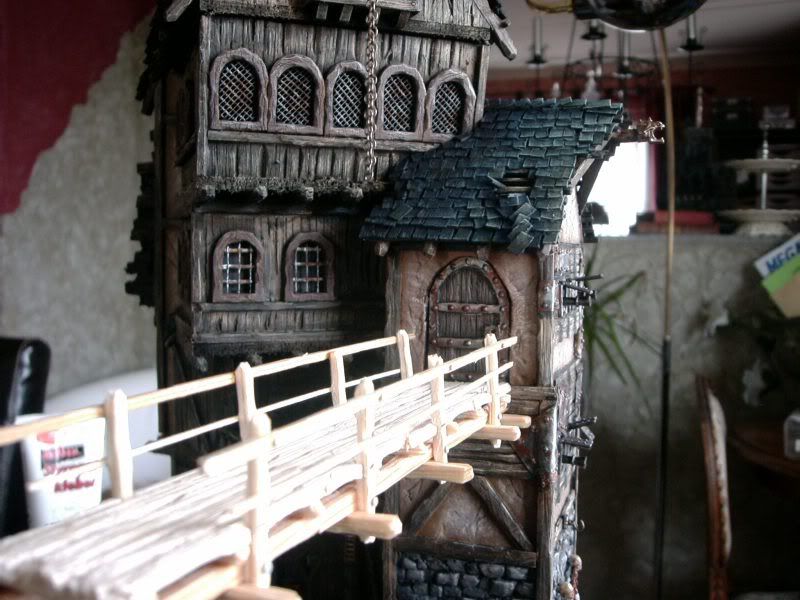
Der Felsen kann über zwei Brücken erschlossen werden. Für die untere Brücke habe ich eine einfache Form aus Styrodur erstellt und diese mit Gips ausgegossen. Nach dem Trocknen konnte der Rohling mit einfachen Werkzeugen bearbeiten werden, um der Brücke einen verwitterten Look zu verpassen. Die obere Brücke sollte einen eher leichteren Eindruck vermitteln und wurde komplett aus Holz gefertigt.
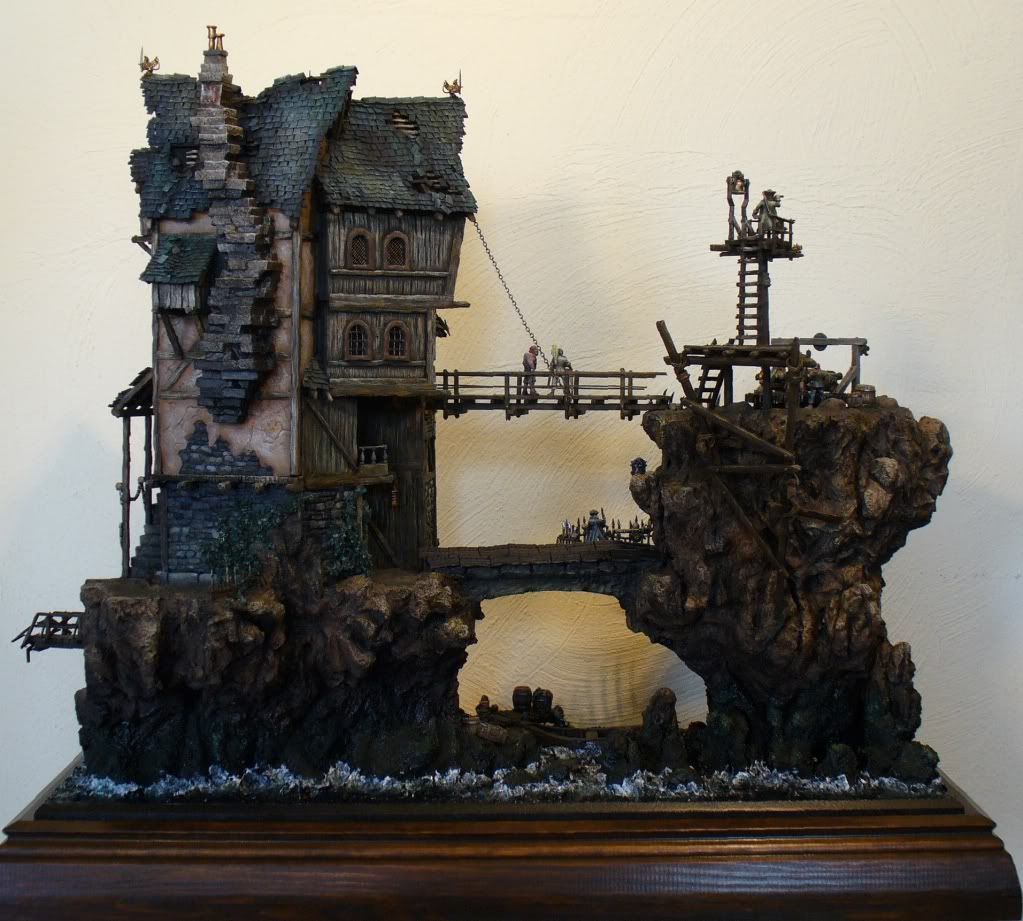
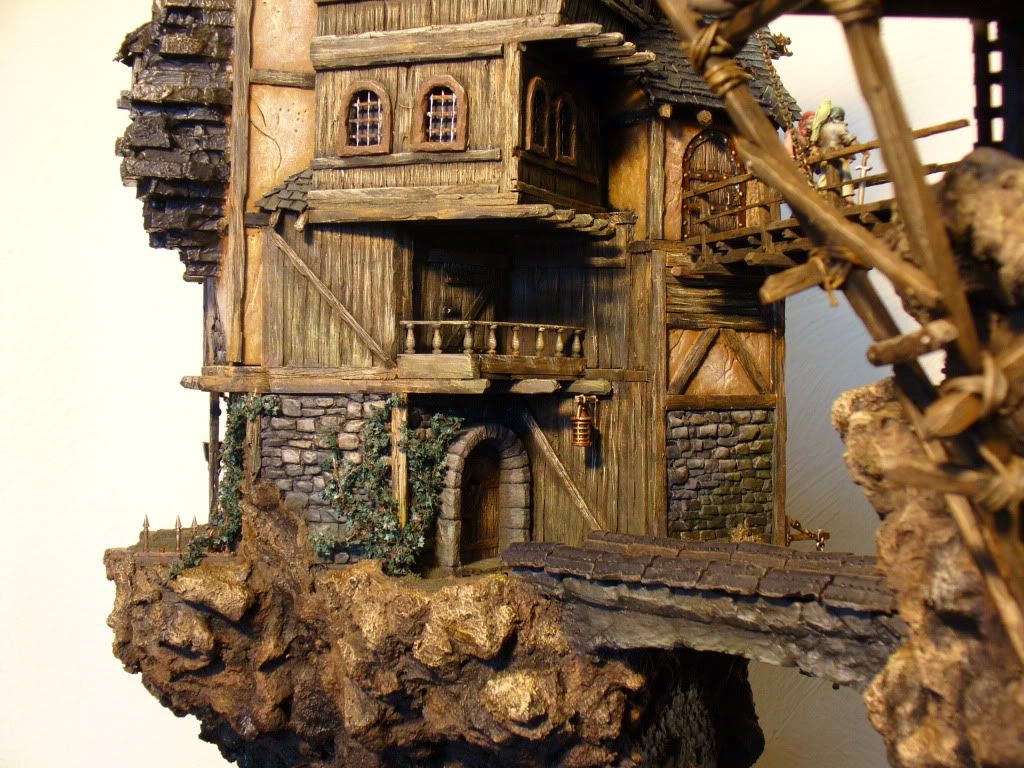
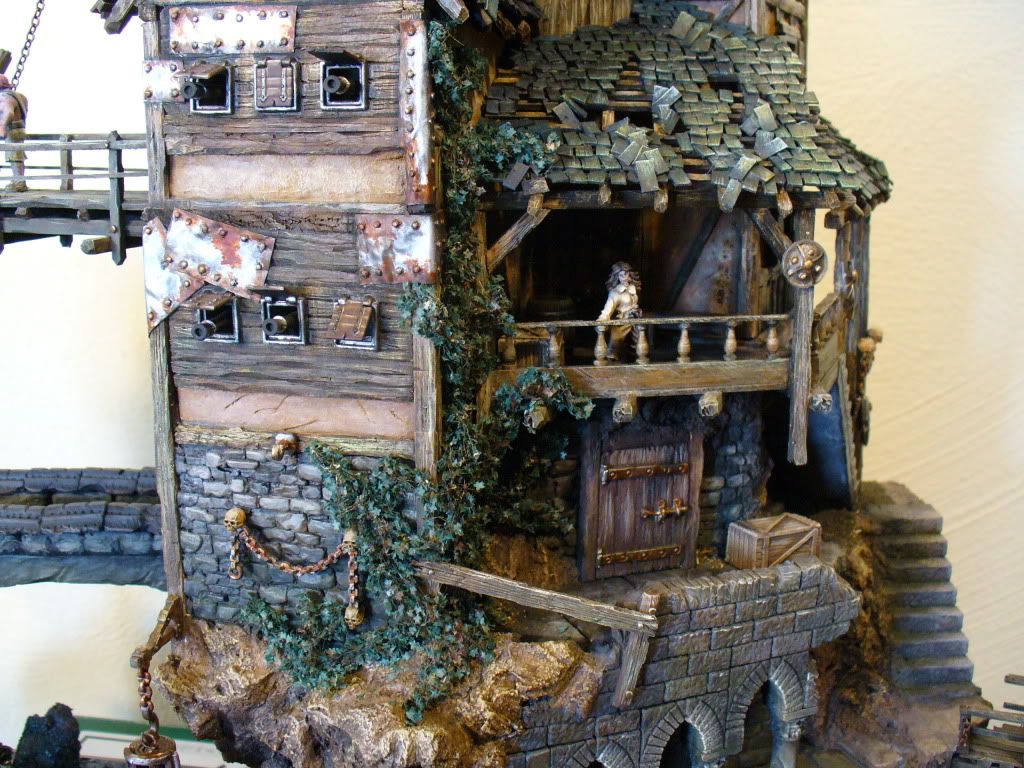
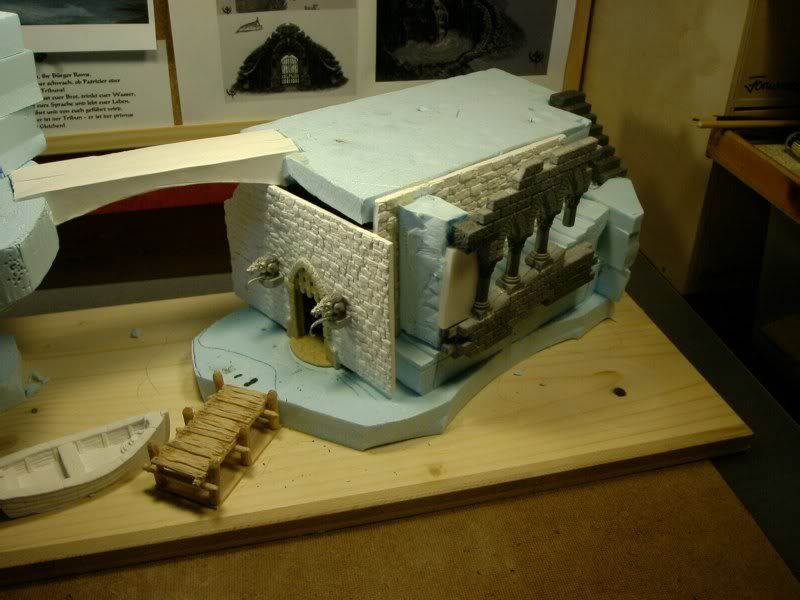
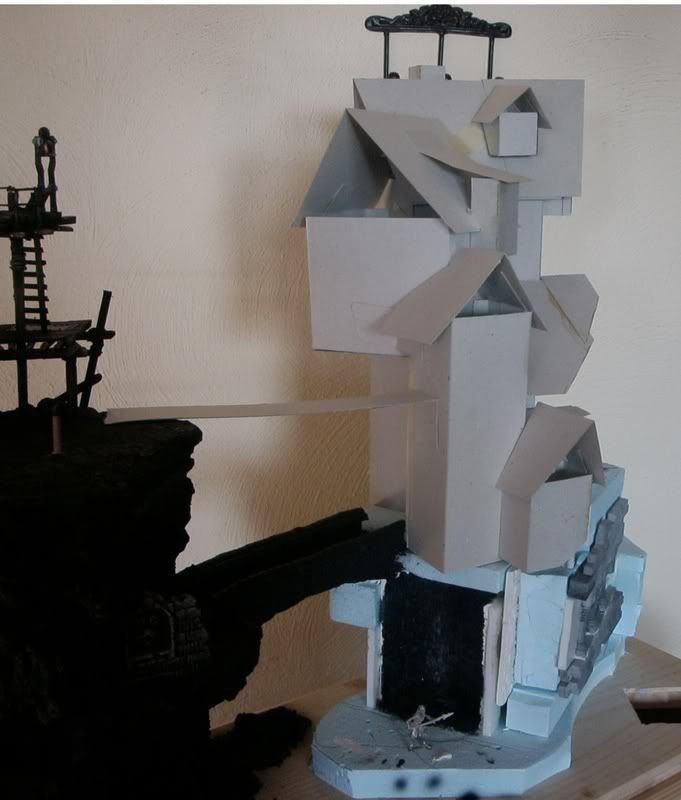
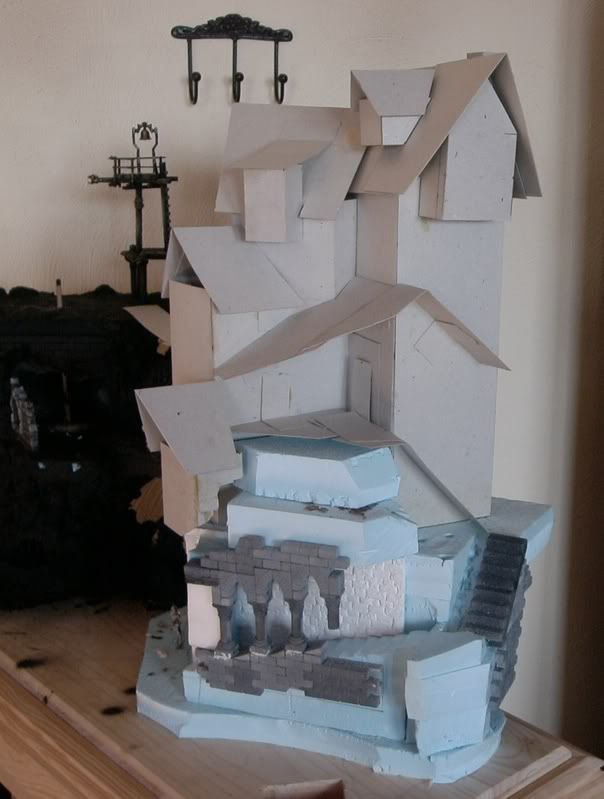
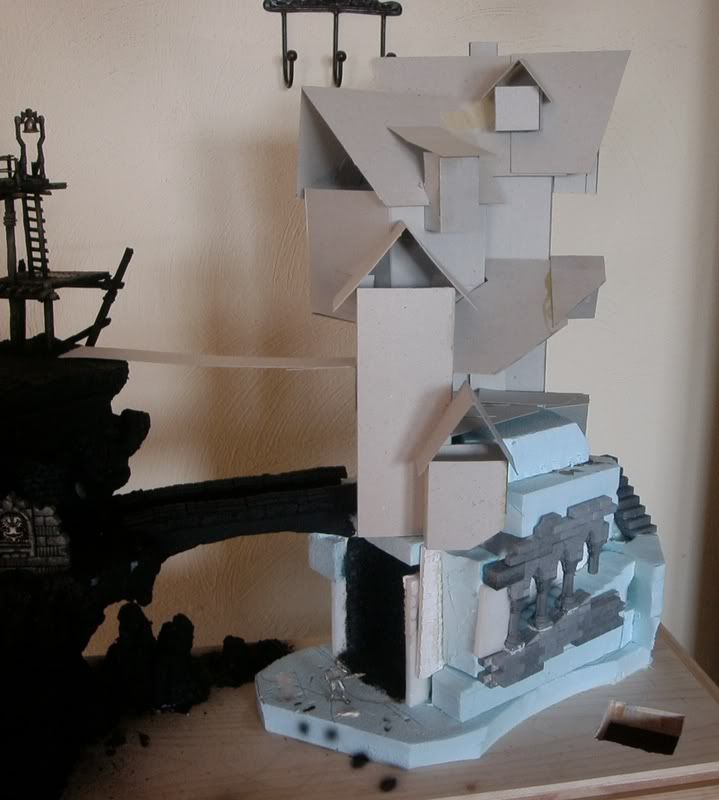
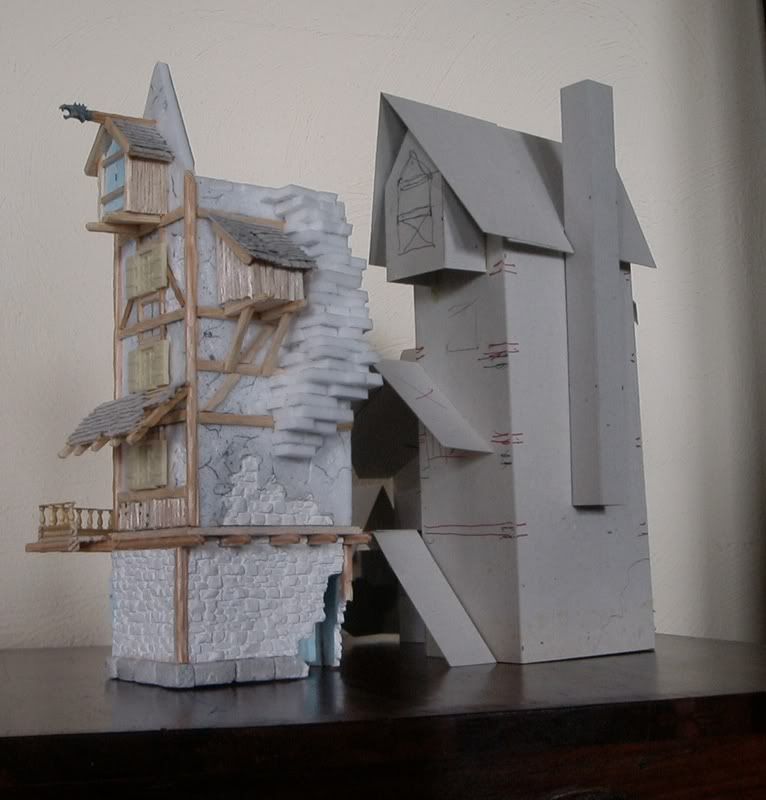
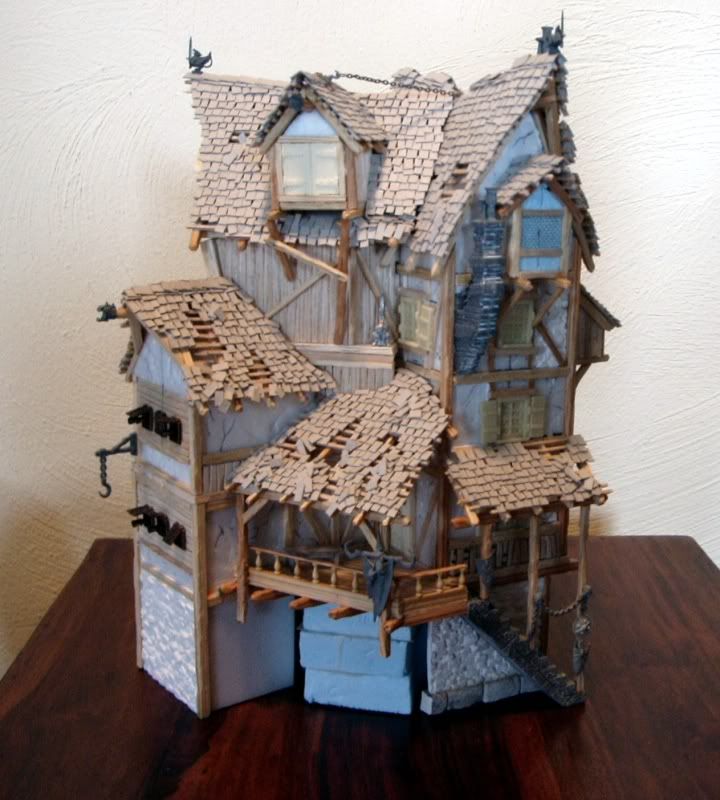
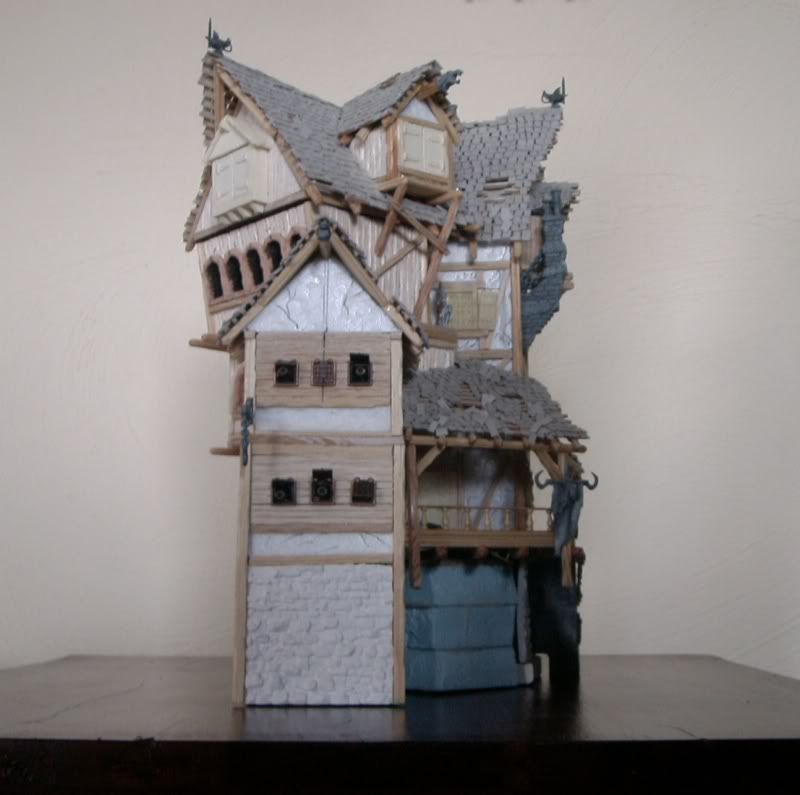
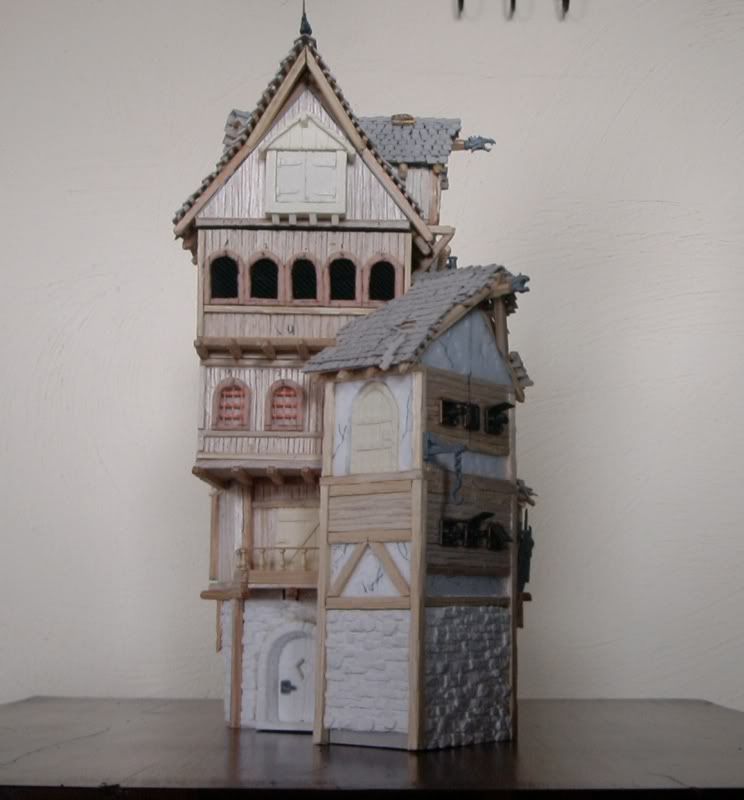
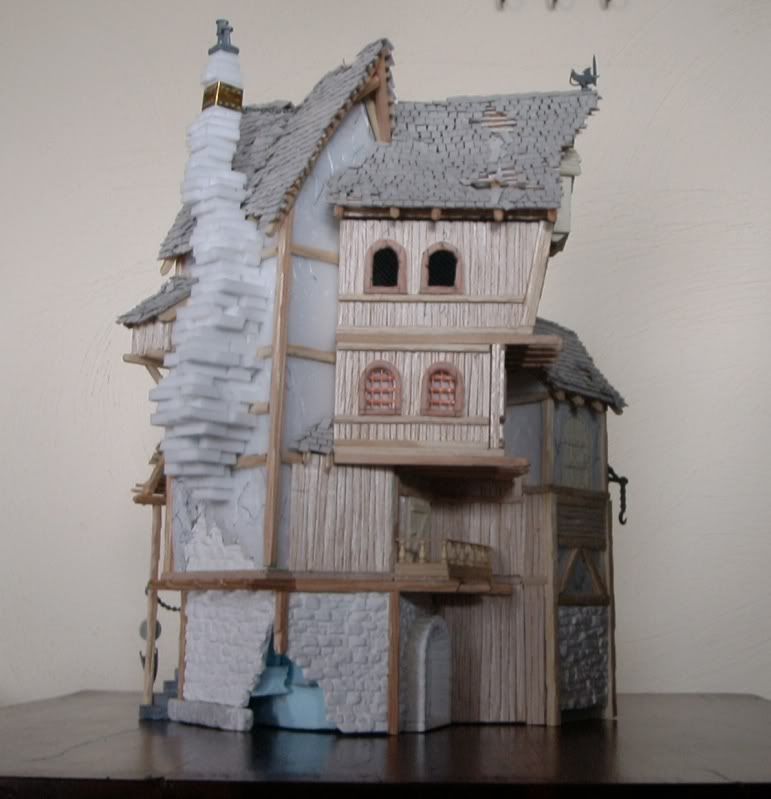
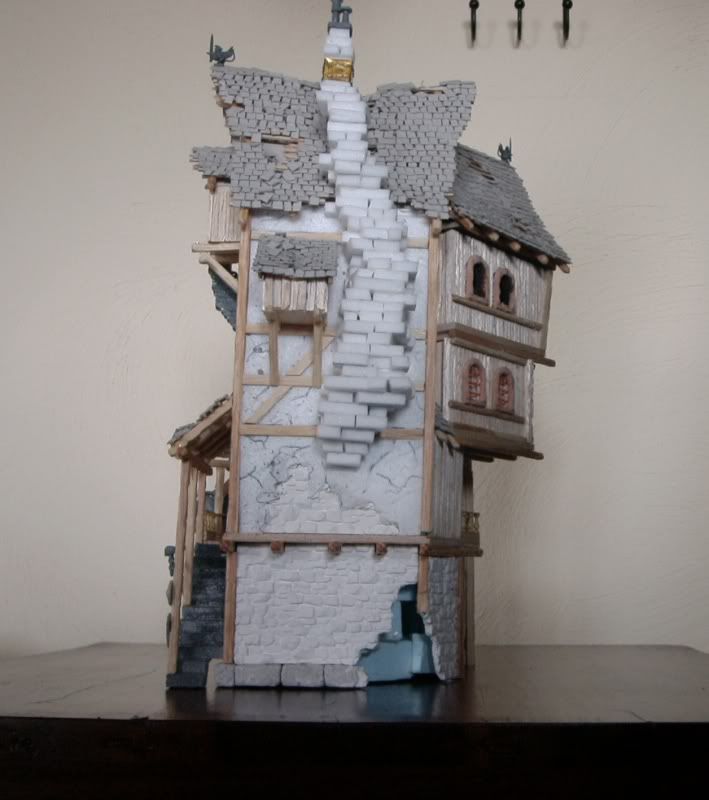
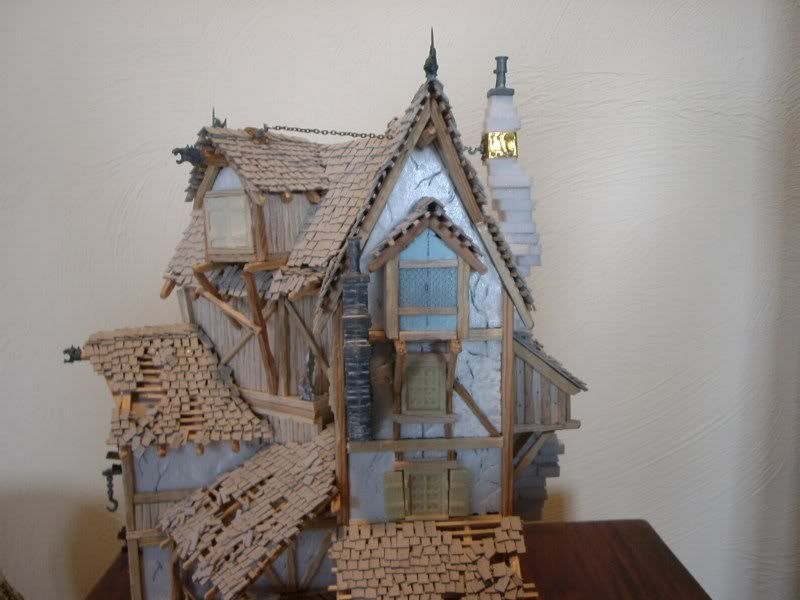
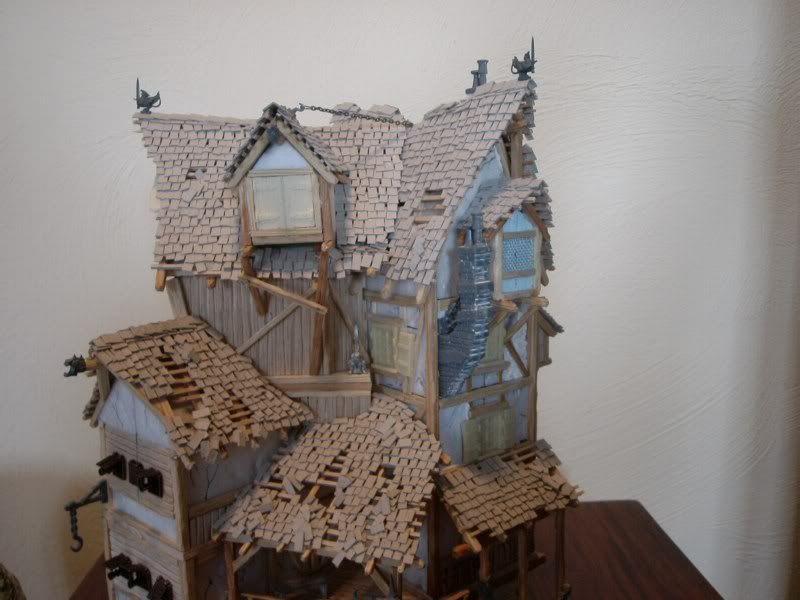
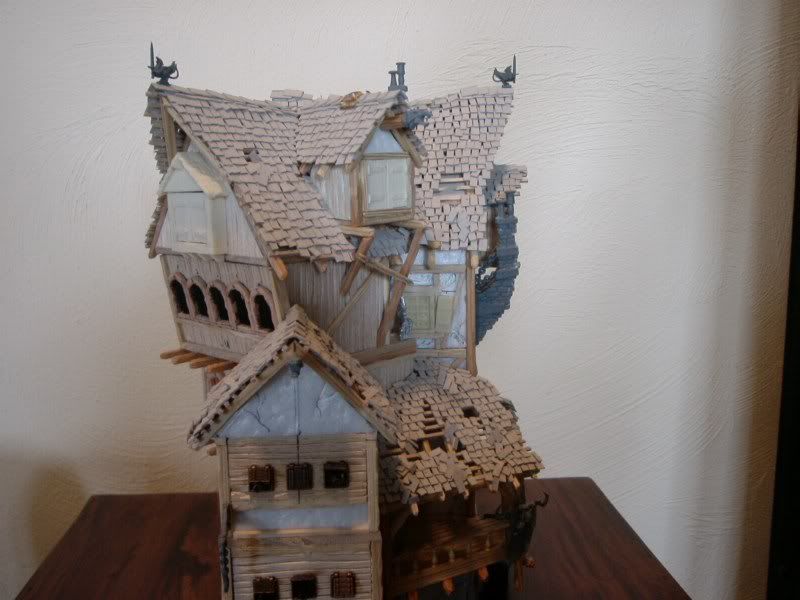
Nun zum Hauptfelsen: Er verkörpert den Unterschlupf, die Heimstatt der Piraten. Zu diesem Zeitpunkt hatte ich nicht die geringste Ahnung, wie das Bauwerk aussehen sollte. Deshalb erstellte ich ein Muster aus Karton. Ich begann mit dem Hauptgebäude (das mit den 2 Schornsteinen) und plötzlich entwickelte die Architektur eine Eigendynamik und ich fügte weitere kleinere Baukörper an, wo es mir passend erschien und stattete diese mit Dächern und Dachgauben aus.
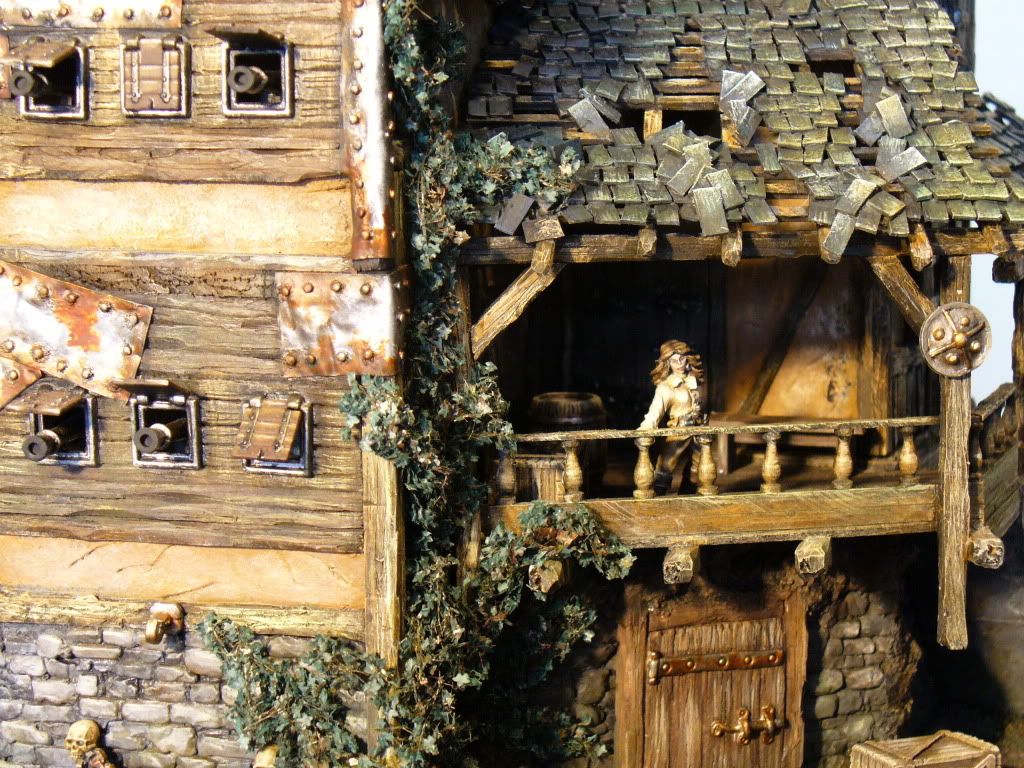
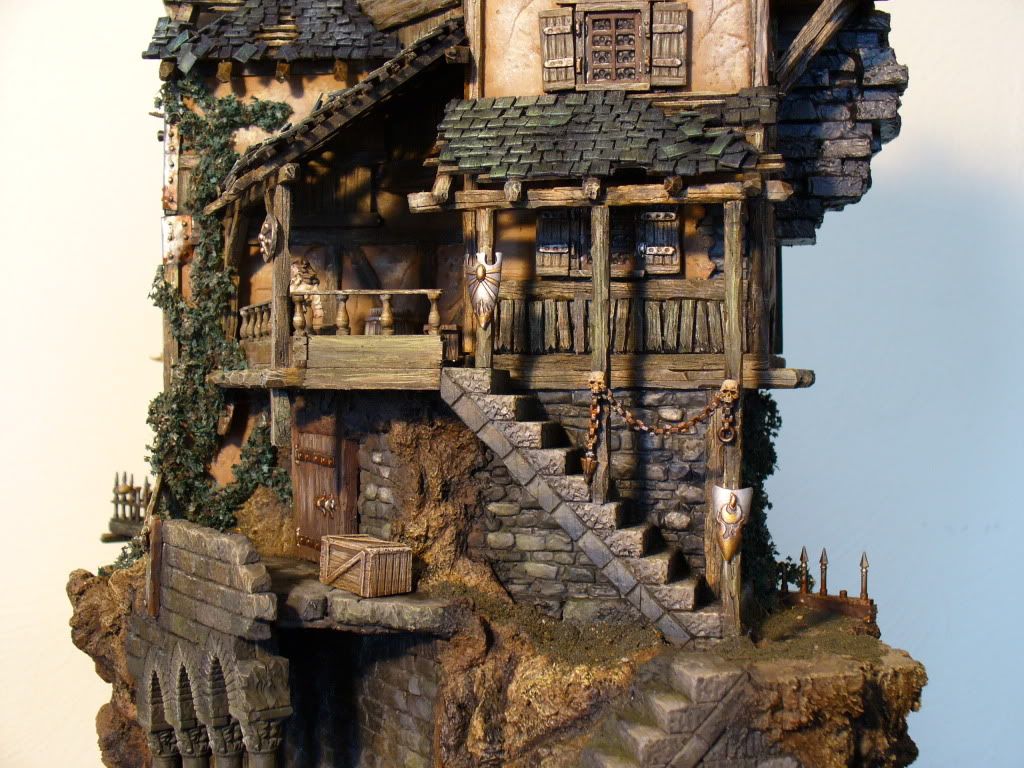
An der Vorderseite hatte das Gebäude eine Art Terrasse auf der die Seemannsbraut sehnsüchtig in die Ferne blickt.
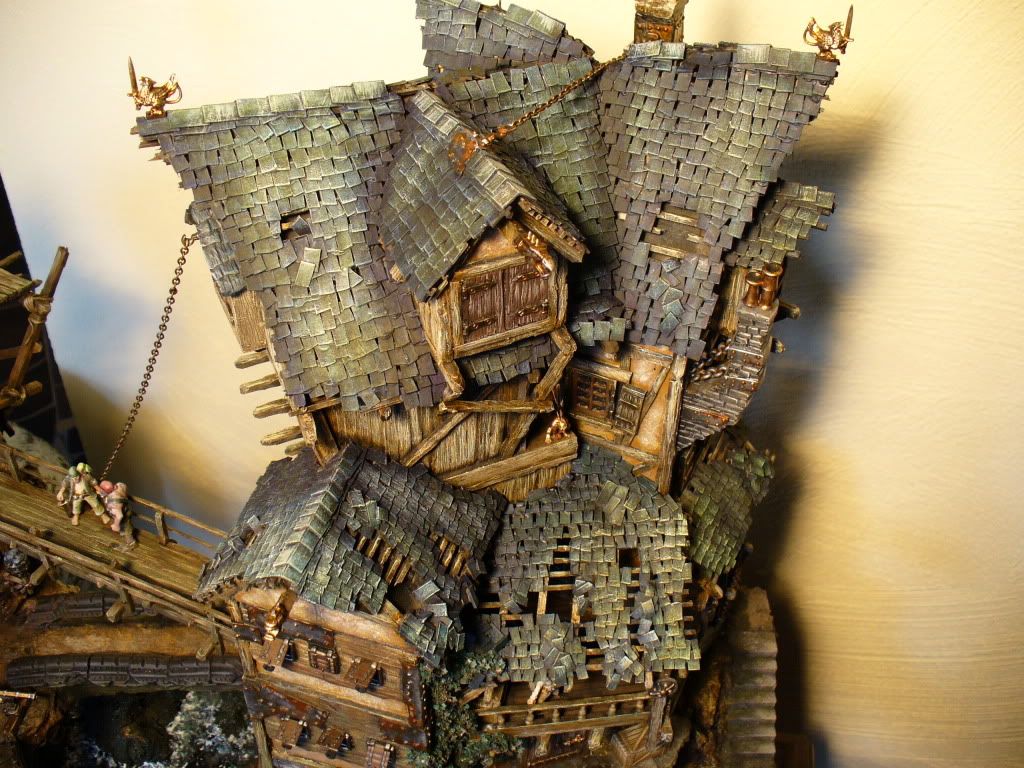
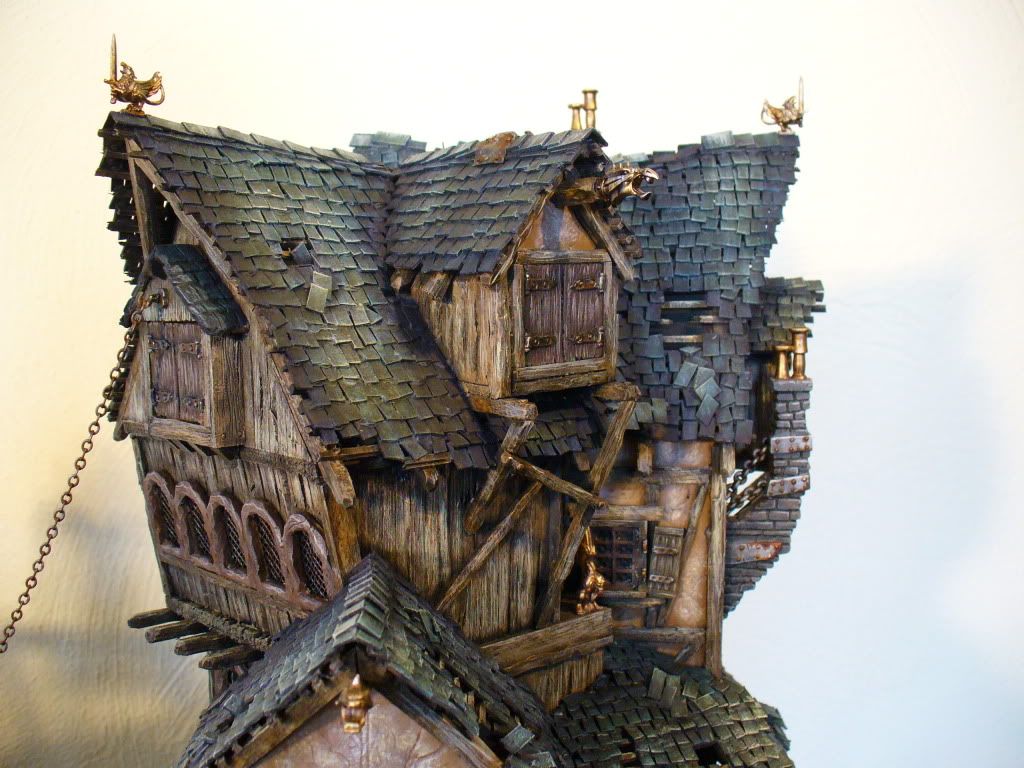
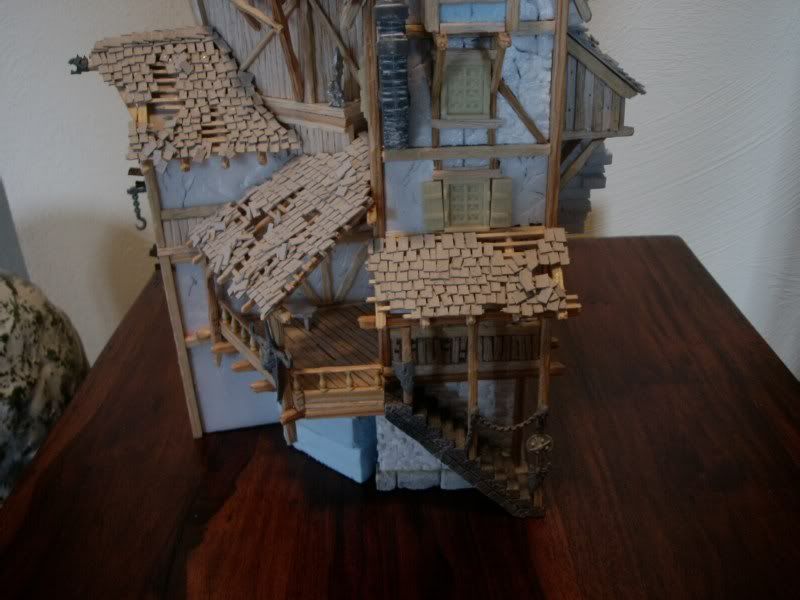
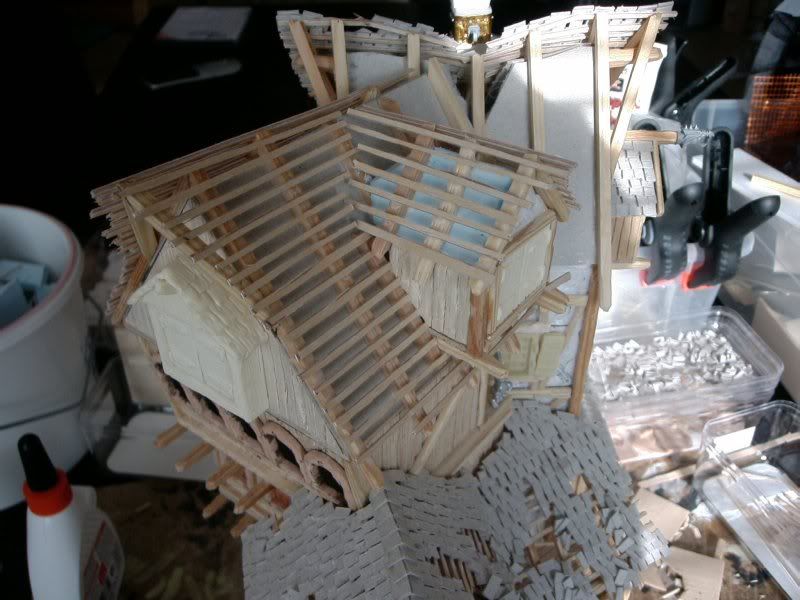
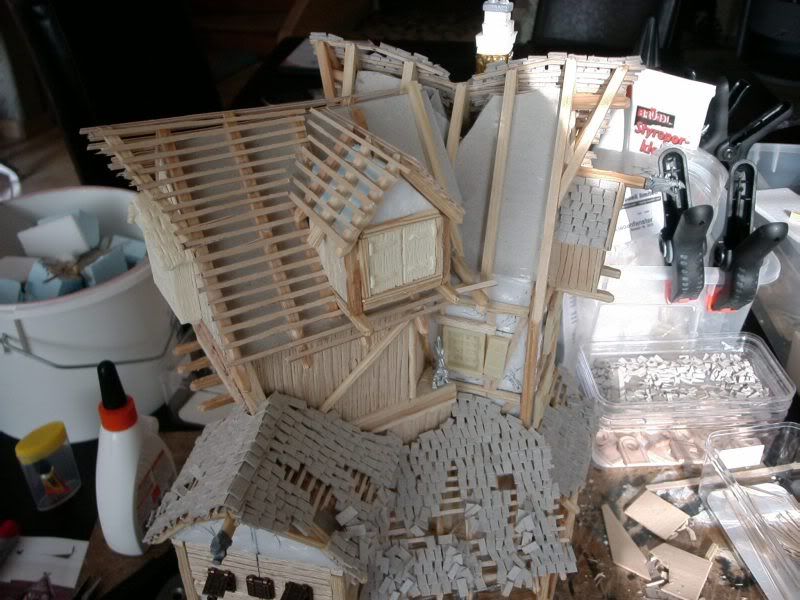
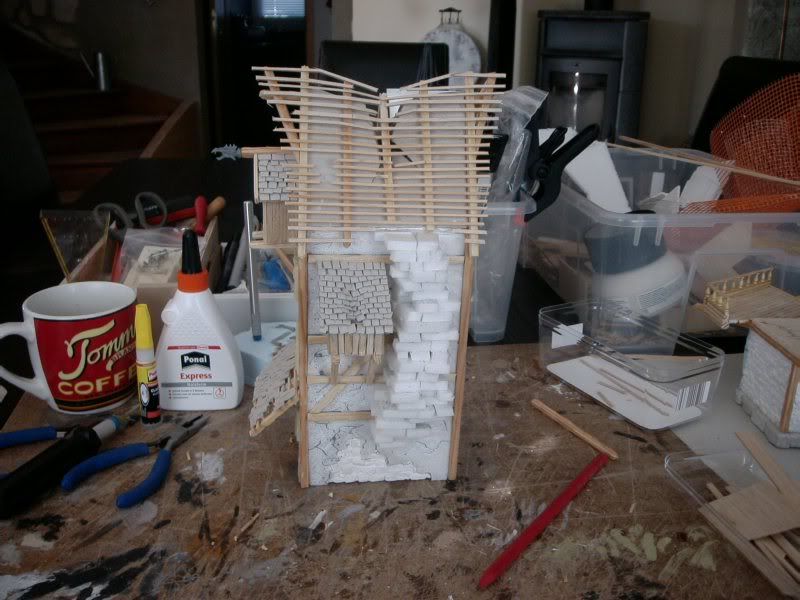
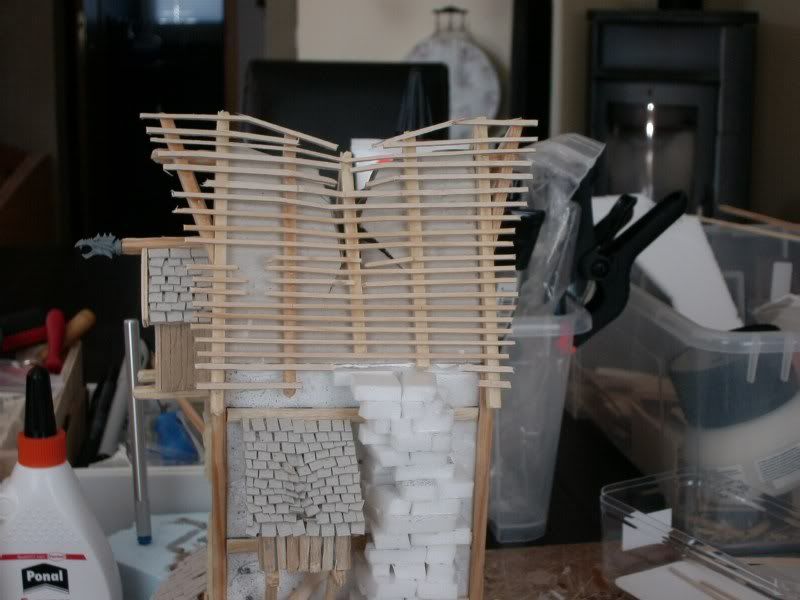
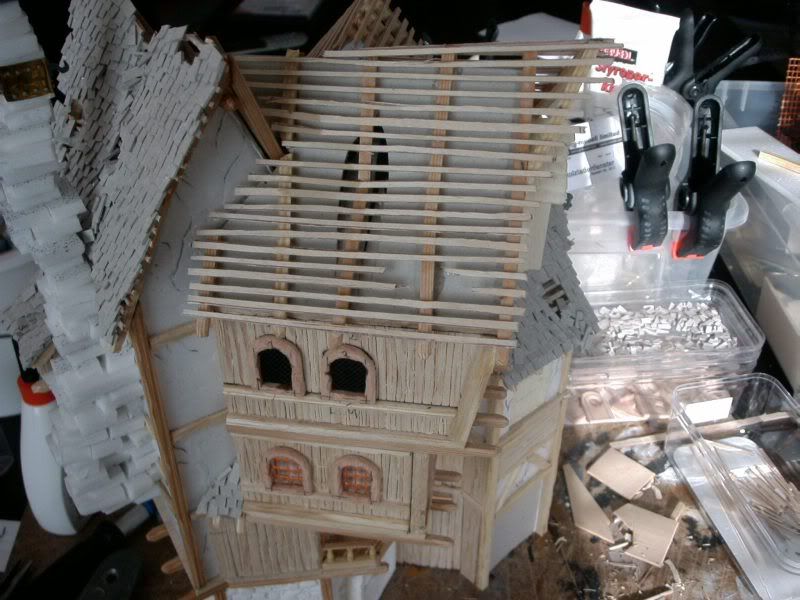
Nachdem ich das Werkmodell fertig gestellt hatte, kopierte ich es nahezu 1:1 auf Balsaholz. Dank des Kartonmusters konnte ich die Maße des Daches direkt übernehmen. Alle Dächer wurden wie reale Dächer konstruiert. Es gibt Dachsparren und -latten, Firste und mehr als 3000 einzeln angebrachte Schindeln.
Die Art, wie ich das Modell aufgebaut hatte, erlaubte mir, während des Entwicklungsprozesses, Ideen sehr spontan umzusetzen, wie zum Beispiel Teile eines eingestürzten Daches darzustellen, die die Bauelemente darunter freigeben.
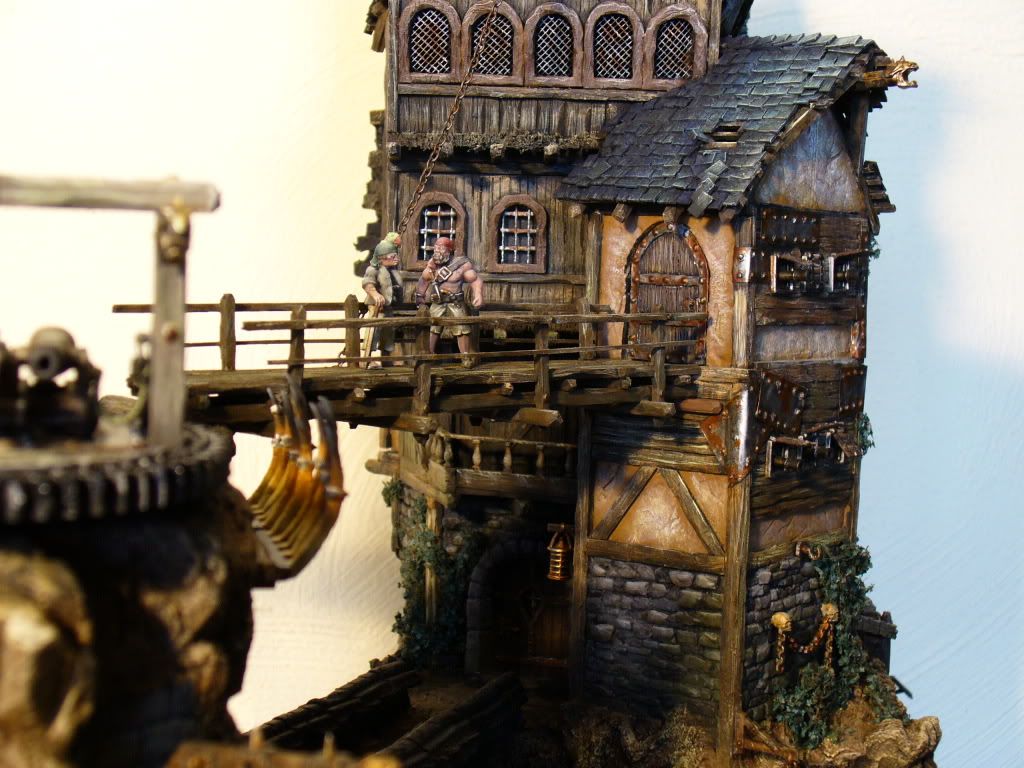
Darüber hinaus sichern sechs Kanonen, die auf das offene Meer hinaus gerichtet sind, das Bauwerk.
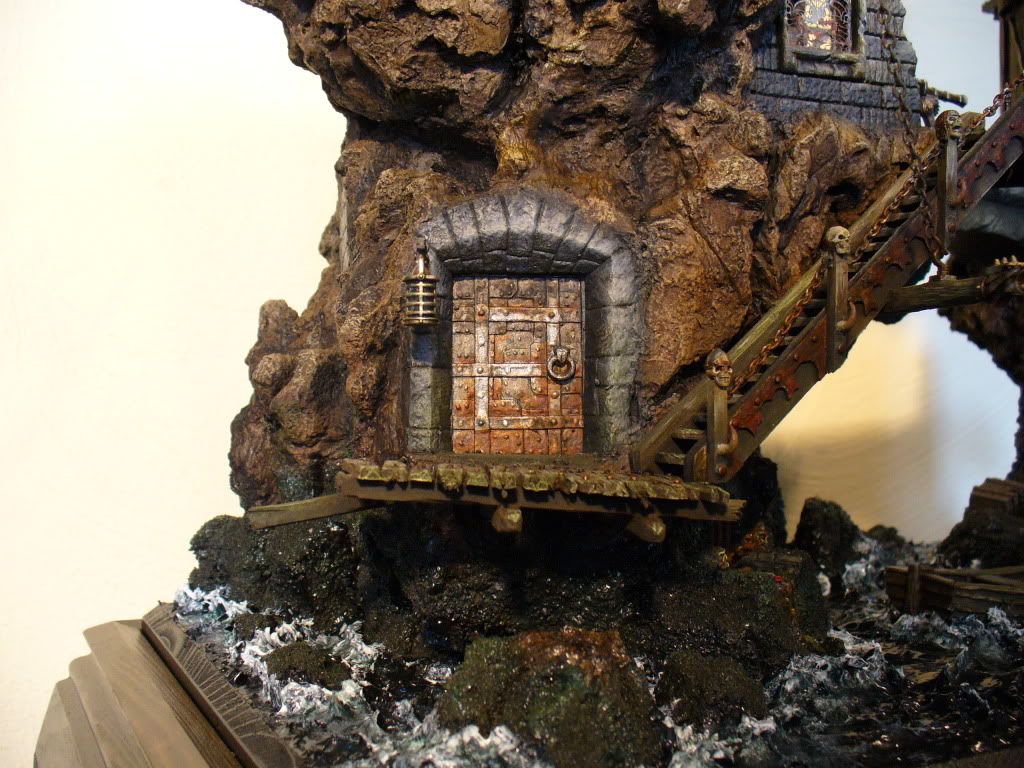
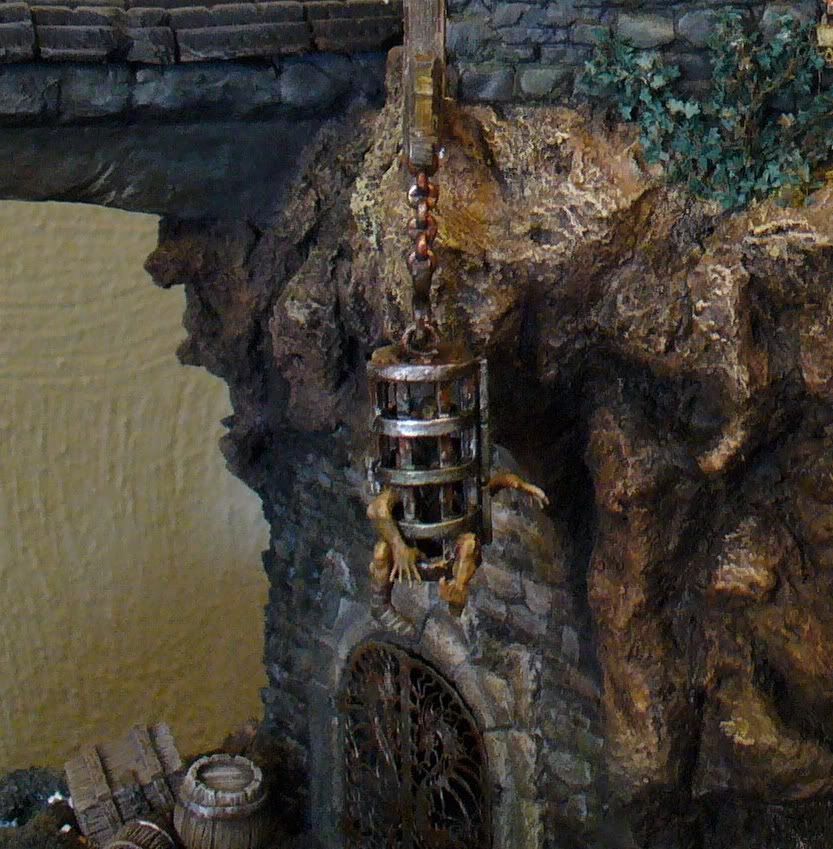
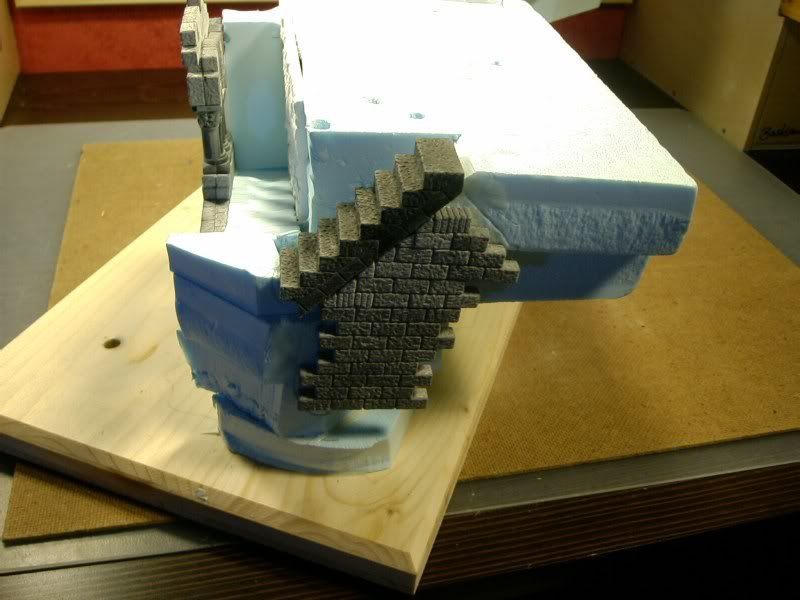
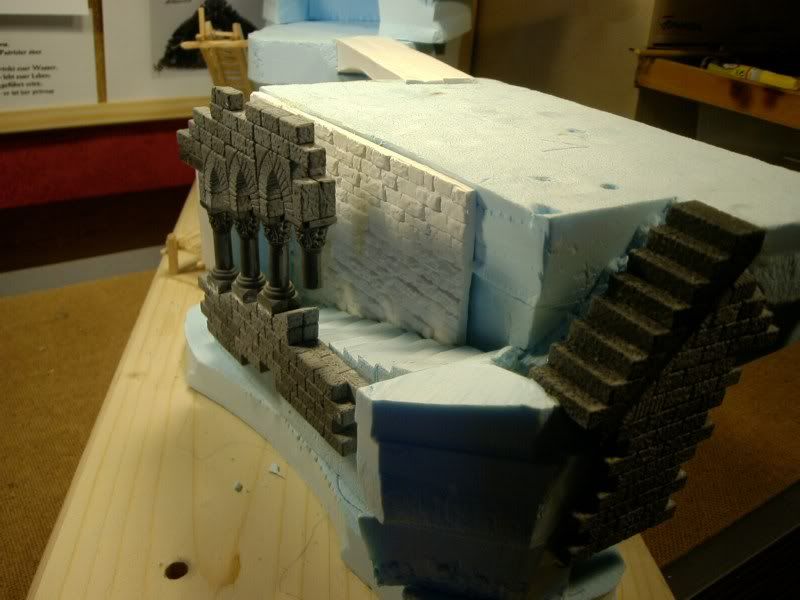
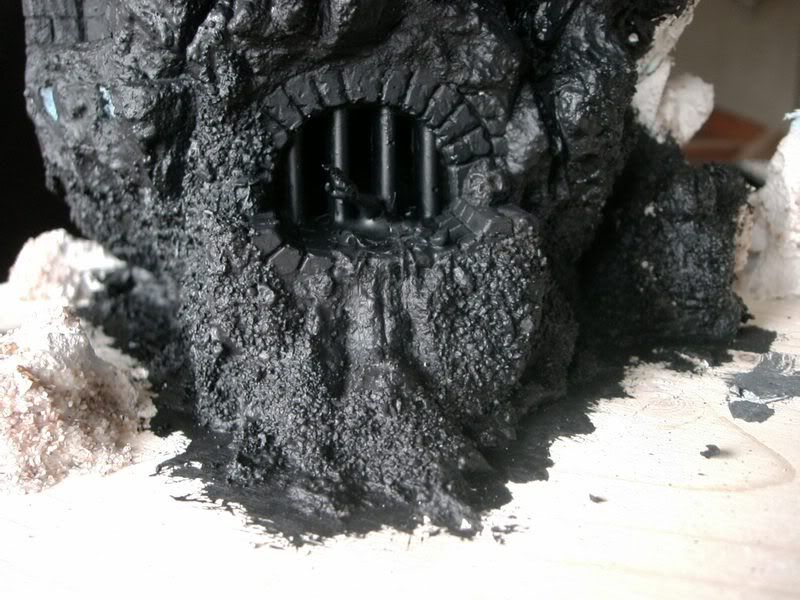
Der Eingang des Gebäudes, zu dem man über einen kleinen Steg Zugang hat, besteht aus einer doppelflügeligen Drachentür. Von hier aus kommt man zu einer halb verfallenen Treppe, die auf die Spitze der Klippe führt, passiert den Kerker mit seinem komplett im Meer versunkenen Turm, in welchem man noch einen in Ketten gelegten Gefangenen sehen kann.
Das gesamte Bauwerk wurde erst nach der Bemalung auf dem Felsen fixiert, denn so war es einfacher, die vielen kleinen Verwinkelungen mit dem Pinsel zu erreichen. Das Modell ist mit handelsüblichen Acrylfarben bemalt, nicht mit den teuren, die normalerweise Verwendung finden. Zuerst wurde alles Schwarz grundiert. Es waren mindestens sechs Überzüge notwendig, denn man entdeckt immer wieder kleine unbemalte Stellen weißen Gipses durchschimmern. Am besten gibt man dem Farb-Wasser-Gemisch etwas Spüli hinzu, um die Oberflächenspannung des Wassers zu brechen.
Alle steinernen sowie hölzernen Elemente wurden mit Braun- und Grüntönen bedeckt, wobei die Farben vom felsigen Bereich Richtung Ozean immer dunkler bis hin zu ganz Schwarz wurden. Ich arbeitete mit Lasuren, um die Farben realistischer wiederzugeben. Am Schluss wurden die in Wassernähe liegenden Bereiche mit einer grün-braunen Lasur aus Ölfarben überzogen, um ihnen ein modriges Aussehen zu verleihen, was man am fertigen Modell sehr schön erkennen kann.
Die verrosteten Elemente wurden mit einer Mischung aus Vallejo-Farben herausgearbeitet. Als Basisfarbe fand „Skin Wash“ Verwendung Für die Schatten benutzte ich „Maroon Brown“ und die sehr dunklen Stellen behandelte ich mit „Sepia“.
Kommen wir nun zur Gestaltung des Wassers. Bei diesem Modell kam „Vallejo Water Effects Pacific Blue“ zum Einsatz, da es sehr einfach zu handhaben ist. Erst tönte ich die Paste mit einer Mischung aus Dunkelgrün und Schwarz ab. Dann trug ich auf die vorher Schwarz grundierte Grundplatte eine dicke Schicht dieser Paste mit einem Pinsel auf. Man erhält eine fantastische Wellenstruktur, wenn man den Pinsel sogleich in die noch bearbeitbare Masse drückt und schnell wieder hochzieht. Dieser Vorgang wurde drei- bis viermal wiederholt. Es ist jedoch wichtig, die Paste zwischen den einzelnen Vorgängen antrocknen zu lassen. Zuletzt wurden die Schaumkronen auf den Wellen mit einem Gemisch aus „Vallejo Water Effects Transparent“ und einer kleinen Menge weißer Farbe ergänzt.
Natürlich braucht so ein Bollwerk auch eine angemessene Mannschaft. Der Stil der Charaktere von „Black Scorpion-Miniatures“ erschien mir als am geeignetsten, da sie sehr realistisch sind. Die Festung beherbergt insgesamt acht verschiedene Figurengruppen.
Insgesamt arbeitete ich ungefähr 400 Stunden, verteilt auf zehn Monate an diesem Diorama – mein bisher größtes Projekt. Der dritte Teil dieser Trilogie wird wohl noch etwas warten müssen, denn ich habe noch so viele andere Ideen, die umgesetzt werden wollen. Vom Piratenleben brauche ich erst einmal eine kleine Pause. Aber ich hoffe, dass dieses Diorama Gefallen findet... yo ho! Yo ho, yo ho!
2008 - the project proceeded with this diorama. In this sequel, I wanted to show the counterpart, also pirates, but still among the living. Even if pirates feel most comfortable on sea, they still need a shelter, a secret anchorage to hide their booty, to recharge their batteries. That’s how I’ve got the idea for the construction of the 2nd Part.
Inspired by illustrations in a variety of pen & paper RPGs, such as eg "Five Fingers" (Privateer Press), I wanted to depict a building built on rocks. It should have a defense system and should look as if it had grown over many years, with new parts built every now and then.
The basic concept was clear to me, and without further thought, I started building. First I laid down the basic measures, about 30 x 70 cm (twice as big as my Black Pirate Phantom) and I have built the base from skirting boards to ensure that the size was fixed. To get a feeling for the dimensions of each rock, I first built a rough model from Stryrodur by simply stacking the remains (small Styrodur blocks). On this basis I have set the altitude of the defensive system and the building. Initially, it should get three rocks in different sizes: the defense system, the building and another smaller rock with a gnarled tree on it. But after having finished the smaller rock, I decided to demolish it though, because it didn’t fit into the overall picture.
Then I began to build the defense system. It’s got a “big gun”, assembled from various guns, which is moved by a gear mechanism in a lower floor, a staircase down to the sea and how it should be for a defense system, an observation tower.
All the rocks are made from Styrodur. First I glued individual plates together and then cut a rough rock structure into the Stryrodur by using a knife, then coated it with commercially building plaster. When this is dry you can very easily carve the final rock structure by using a screwdriver for example. The areas of rocks, which are just above sea level, I plastered with coarse sand, which makes it look like sea shells after having painted it.
The observation tower, the platform and the stairs are made of wood slats, all from the hardware store. I have tried to recreate all the wooden structures from real role models and "statically" correct, so the whole scene should become as authentic as possible.
I have installed here, as in the whole diorama, a variety of small items of all kinds of manufacturers. What I found suitable I used.
There’s access to this rock to from two bridges. In the lower bridge, I have designed a simple form from Stryrodur and filled with plaster. After drying, the crude form can be worked by using simple tools, to get it a “used look”. The upper bridge was supposed to look very airy, it is entirely made of wood.
Now to the main cliff. It represents the shelter, the home of pirates. At this stage I didn’t have the slightest idea how the building should look like. Therefore I have made a crude cardboard working model. I started with the main building (with the two chimneys) and out of a sudden it went of its own volition. Where I found adequate I attached more small buildings and equipped them with roofs and dormers. In front it’s got a kind of terrace, where the sailor's bride looks longingly into the distance. After finishing the work model, I copied it almost 1on1 with balsa wood. Thanks to the working model, I could take the measures for the complex roof construction directly from it. All roofs are designed like real roofs. There are rafters, purlins, ridges, roof battens and more than 3000 individually fixed roof shingles. Erecting the model as I did, I was able to set new ideas very spontaneously during the construction progress, for example parts of collapsed roof, to show the elements of construction below.
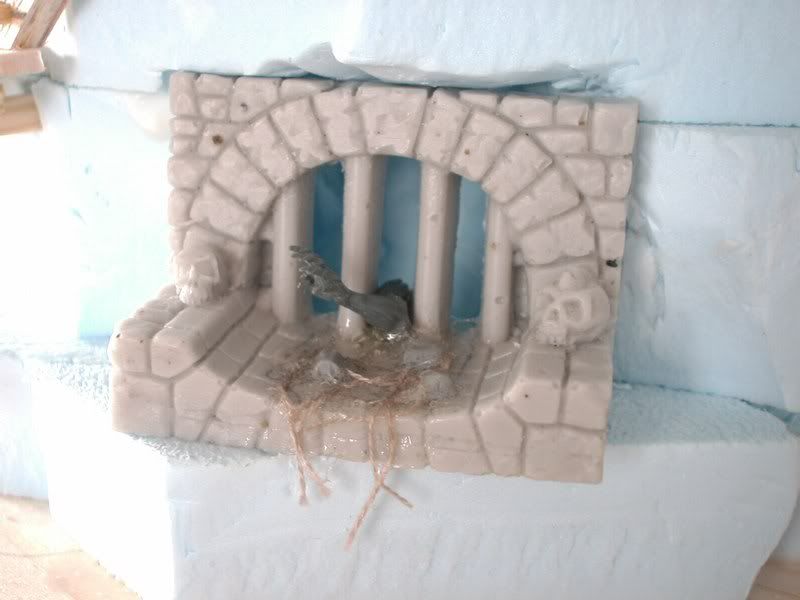
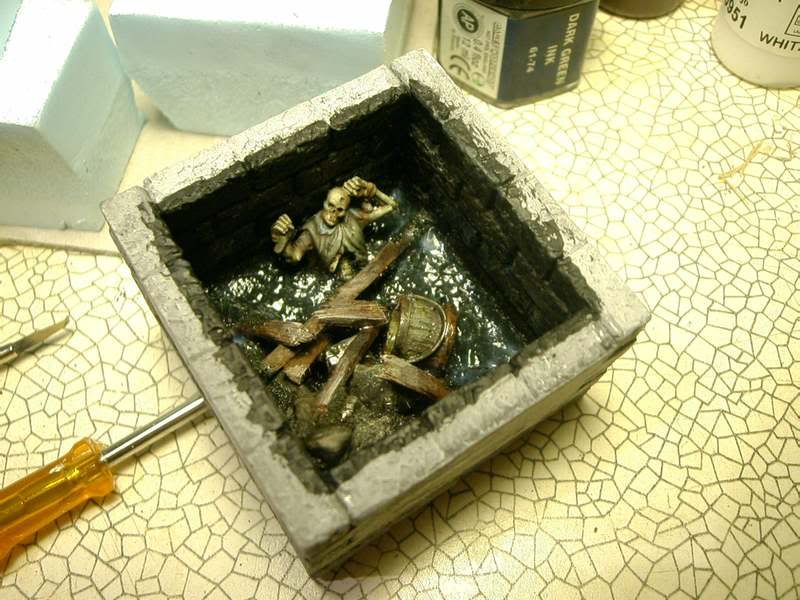
Six guns, directed to the open sea, protect the building in addition. Access to the building is a double-winged Dragondoor, which can be reached via a small jetty. From the doorway you get through a partially collapsed staircase outside the cliff top, pass the dungeon with its completely sunken tower inside which you can see a chained prisoner.
The entire building wasn’t fixed on the rock before I finished its painting. This way it was easier to reach those many little nooks and crannies with the brush. The whole part is painted with commercially available acrylic colours, not with the usually used and expensive colours. First I primed everything black in at least 6 layers, because you discover again and again small unpainted points in the white plaster, still shining through. It’s best to add some detergent to the colour-water-mixture, so the tension of the water surface is destroyed.
So we have now arrived at the design of the water. In this model I used "Vallejo Water Effects Pacific blue" because it is relatively easy to handle. I've toned down the paste with a mixture of dark green and black, and simply put a thick coat on the previously black primed base plate, with a brush. Thereafter press the brush into the paste and quickly pull it up. This way you’ll get an excellent wave. I repeated the whole process about three or four times, but it’s important to let it dry between every application. Finally, I carefully added the whitecaps with "Vallejo Water Effects transparent", mixed with a very small amount of white colour.
Of course, a stronghold also needs an adequate team. The character’s style of “Black Scorpion” I considered the most appropriate , since they have a very realistic look. A total of eight characters can be seen on the fortress. All figures are painted with oil paints.
Overall, it took me approximately 400 hours within 10 months to complete this diorama, my biggest project to date.
The third and final part will have to wait. Currently there are so many other ideas that I want to implement, from pirates life I need a small break.
Hope you like this one... yo ho! Yo ho, yo ho!
Mojoon Bericht, Piraten Teil 2
PIRATES!
“We`re
devils,
we`re black sheep,
we`re really bad eggs.
Drink up, me hearties, yo ho!
Yo ho, yo ho!
A pirate`s life for me!
we`re black sheep,
we`re really bad eggs.
Drink up, me hearties, yo ho!
Yo ho, yo ho!
A pirate`s life for me!
But when
the wild, raging storm did cease,
Under the billows two hearts found peace,
No more to part, no more of pain,
The bell may now tell its warning in vain.”
Under the billows two hearts found peace,
No more to part, no more of pain,
The bell may now tell its warning in vain.”
Pirates
have always fascinated me, and probably motivated by the blockbuster movies in
recent times I’ve got the idea to realize the topic not in one but in three
dioramas.
2007 – starting shot for the first part of the trilogy, called "Black Pirate Phantom". The idea of this "overture" was to show a pirate ship whose crew already was among the dead, spreading fear and terror by travelling over the seas on their phantom – which is half ship, half fortress.
2007 – starting shot for the first part of the trilogy, called "Black Pirate Phantom". The idea of this "overture" was to show a pirate ship whose crew already was among the dead, spreading fear and terror by travelling over the seas on their phantom – which is half ship, half fortress.
2008 - the project proceeded with this diorama. In this sequel, I wanted to show the counterpart, also pirates, but still among the living. Even if pirates feel most comfortable on sea, they still need a shelter, a secret anchorage to hide their booty, to recharge their batteries. That’s how I’ve got the idea for the construction of the 2nd Part.
Inspired by illustrations in a variety of pen & paper RPGs, such as eg "Five Fingers" (Privateer Press), I wanted to depict a building built on rocks. It should have a defense system and should look as if it had grown over many years, with new parts built every now and then.
The basic concept was clear to me, and without further thought, I started building. First I laid down the basic measures, about 30 x 70 cm (twice as big as my Black Pirate Phantom) and I have built the base from skirting boards to ensure that the size was fixed. To get a feeling for the dimensions of each rock, I first built a rough model from Stryrodur by simply stacking the remains (small Styrodur blocks). On this basis I have set the altitude of the defensive system and the building. Initially, it should get three rocks in different sizes: the defense system, the building and another smaller rock with a gnarled tree on it. But after having finished the smaller rock, I decided to demolish it though, because it didn’t fit into the overall picture.
Then I began to build the defense system. It’s got a “big gun”, assembled from various guns, which is moved by a gear mechanism in a lower floor, a staircase down to the sea and how it should be for a defense system, an observation tower.
All the rocks are made from Styrodur. First I glued individual plates together and then cut a rough rock structure into the Stryrodur by using a knife, then coated it with commercially building plaster. When this is dry you can very easily carve the final rock structure by using a screwdriver for example. The areas of rocks, which are just above sea level, I plastered with coarse sand, which makes it look like sea shells after having painted it.
The observation tower, the platform and the stairs are made of wood slats, all from the hardware store. I have tried to recreate all the wooden structures from real role models and "statically" correct, so the whole scene should become as authentic as possible.
I have installed here, as in the whole diorama, a variety of small items of all kinds of manufacturers. What I found suitable I used.
There’s access to this rock to from two bridges. In the lower bridge, I have designed a simple form from Stryrodur and filled with plaster. After drying, the crude form can be worked by using simple tools, to get it a “used look”. The upper bridge was supposed to look very airy, it is entirely made of wood.
Now to the main cliff. It represents the shelter, the home of pirates. At this stage I didn’t have the slightest idea how the building should look like. Therefore I have made a crude cardboard working model. I started with the main building (with the two chimneys) and out of a sudden it went of its own volition. Where I found adequate I attached more small buildings and equipped them with roofs and dormers. In front it’s got a kind of terrace, where the sailor's bride looks longingly into the distance. After finishing the work model, I copied it almost 1on1 with balsa wood. Thanks to the working model, I could take the measures for the complex roof construction directly from it. All roofs are designed like real roofs. There are rafters, purlins, ridges, roof battens and more than 3000 individually fixed roof shingles. Erecting the model as I did, I was able to set new ideas very spontaneously during the construction progress, for example parts of collapsed roof, to show the elements of construction below.
Six guns, directed to the open sea, protect the building in addition. Access to the building is a double-winged Dragondoor, which can be reached via a small jetty. From the doorway you get through a partially collapsed staircase outside the cliff top, pass the dungeon with its completely sunken tower inside which you can see a chained prisoner.
The entire building wasn’t fixed on the rock before I finished its painting. This way it was easier to reach those many little nooks and crannies with the brush. The whole part is painted with commercially available acrylic colours, not with the usually used and expensive colours. First I primed everything black in at least 6 layers, because you discover again and again small unpainted points in the white plaster, still shining through. It’s best to add some detergent to the colour-water-mixture, so the tension of the water surface is destroyed.
Both rocks
and wood are decorated in brown and grey tones, from the rock towards the sea
colours become increasingly dark to black. I work with glazes to get a
realistic colour scheme. Finally, the areas that are close to the water I gave
a green-brown oil glaze to get it a musty effect, this can be seen by the true
model very well. All the rusty bodies are a combination of the
"Vallejo" colors "Skin Wash" as the keynote, "Maroon
brown” for the shade and "Sepia" for the very dark areas.
So we have now arrived at the design of the water. In this model I used "Vallejo Water Effects Pacific blue" because it is relatively easy to handle. I've toned down the paste with a mixture of dark green and black, and simply put a thick coat on the previously black primed base plate, with a brush. Thereafter press the brush into the paste and quickly pull it up. This way you’ll get an excellent wave. I repeated the whole process about three or four times, but it’s important to let it dry between every application. Finally, I carefully added the whitecaps with "Vallejo Water Effects transparent", mixed with a very small amount of white colour.
Of course, a stronghold also needs an adequate team. The character’s style of “Black Scorpion” I considered the most appropriate , since they have a very realistic look. A total of eight characters can be seen on the fortress. All figures are painted with oil paints.
Overall, it took me approximately 400 hours within 10 months to complete this diorama, my biggest project to date.
The third and final part will have to wait. Currently there are so many other ideas that I want to implement, from pirates life I need a small break.
Hope you like this one... yo ho! Yo ho, yo ho!
Hier zwei ausführliche Berichte von mojoon:
Mojoon Bericht, Piraten Teil 1Mojoon Bericht, Piraten Teil 2




















stunning
AntwortenLöschenHi, awsome, stunning work. May I ask you about resaurces of inspiritaion? You have some concept at your corkboard, but I am not able to identife tham :-( Is there any WIP pictures with tutorials at some forum? A I have your jurnal, but I want more more and more pls...
AntwortenLöschenThx collak@seznam.cz
just awesome!
AntwortenLöschenUnbelievable piece of work! Why have I not been following this marvel already!?
AntwortenLöschenThanks a lot Werekin!
LöschenThis is fantastic work, would love to read more details about it, but the 2 links to Mojoon are not working anymore.
Löschenthanks for the hint. I´ve added the english text and the links are working.
AntwortenLöschen...es ist beeindruckend mit welchem Einfühlungsvermögen jemand solch ( hier stellvertretend für alle seine Projekte ) Piratennest erschafft. Die Mischung aus maroder Stellage und funktioneller Rückzugsburg für Freibeuter, legt einen neuen ''Maßstab'' für Modellbauer fest. Man möchte dort oben fast seinen Zinnbecher Rum leeren.
AntwortenLöschenIch bau selber im Maßstab 1:13 Freelance Eisenbahnmodelle einer fiktiven Stonehenge Eisenbahn ( irgendwie müssen die Meghalite und Dolmen ja dorthin gekommen sein :-)) )und lasse meine eigene Kreativität gerne vom Zügel, aber hier nehme ich gerne noch eine Extraportion Lehrgeld mit.
Viel Erfolg, Zeit, Kreativität und Ausdauer für weitere Projekte wünsch ich noch....
Danke dir Anonymus!
LöschenGibt es einen Link zu deinen Arbeiten? Eine Stonehenge Eisenbahn hätte mich interessiert.
Gruß Trull
Ganz ausgezeichnete Arbeit! Das Diorama / Gelände ist wirklich faszinierend.
AntwortenLöschenDanke auch für die Einblicke in deine Arbeitsweise, die helfen mir blutigem Anfänger sehr weiter.
hallo,
AntwortenLöschenSehr, sehr schön Diorama ....
Können Sie mir Referenzen Figuren und andere Details (Skelett, Schädel, Ketten, Arm aus dem Mund von Kanalnetzen, Türen, Fenster, Rollläden etc etc etc.
Ich danke Ihnen
JN
Wat a AMAZING diorama :-) :-)
AntwortenLöschenI've just discover your blog coming from table-top website. It is brilliant ! I like it.
I'm also building lots scenery for figurines... Have a look at my (old) website :
http://vergeylen.eu/stephane4/?q=content/manoir-hant%C3%A9
I'm currently building a castle and I would like your opinion for the painting... What is your email address ? My email is stephane at vergeylen.eu
See you soon
Stephane, 28, Belgium, Brussels
Fantastic work !! This is one great piece of awesomeness!!
AntwortenLöschenThanks!
AntwortenLöschenAre any of these amazing creations for sale? I would love to list them on my pirate website at ibeapirate.com
AntwortenLöschenammezing...work....love it.
AntwortenLöschenHi,
AntwortenLöschenyour creationas are amazing ! is it possible to buy ? We are interested in PIRATEN, in order to use it in a Fragrances Salon/ salon in Firenze in september ( Pitti Fragranze ) Please let me know...Thanks a lot.
Filippo Sorcinelli
please write at
AntwortenLöscheninfo@unumparfum.com
RE:�� Cooperation on blog
AntwortenLöschenDear fantastische-welten.blogspot.,
My name is Katy and I am the Marketing Manager of medievalbrick, and I have visited your site fantastische-welten.blogspot.com.and believe it would be a valuable resource for my website browsers.
Our website mainly focuses on medieval building blocks, such as castles, Viking series building blocks, villages, pirates, etc., which are highly relevant to your website theme, we believe that our high-quality and competitive products can bring you a lot of benefits because you Our visitors are also building block lovers, so here we sincerely invite you to write a product evaluation blog for us, and we will send you a set of building blocks for you to evaluate. In return, I will ask you to provide an honest review article with a link to the product, and this article will be shared on our website and social media.
Doing so would offer a valuable resources to your visitors and improve website authority for both of us.
Or we can also cooperate with the guest post, and you give us a review soft article with products links insert and we share it on our website also social media, and provide you at least 10% sales commission or articles fees.
If you are interested in cooperation, pls freely contact us without any hesitation, look forward to receiving your fastest reply.
Hope you have a nice day
Best Regards,
katy